For all of my American readers, the 4th of July is about many things... freedom, independence, burgers and hot dogs, that awesome speech from the movie Independence Day (shout out if you know what I'm talking about) and of course the Red, the White and the almighty Blue! And for as long as I can remember we've celebrated with tasty treats like red white and blue cookies and cakes and sweets on sweets on sweets...
Well it seems as though that sugary celebration has done a lot more harm than good. But, that's no worries. We can still have fun, we can still enjoy our tasty red, white and blue treats. We just need to change up the ingredients a bit, because that's what The Fatbody is all about... ditching the sugar without giving up the foods we love.
This one simple change in our diets could be dramatically beneficial to our overall health, but that's a battle for another day because we've got sugar free/grain free trifle to eat!
This year I decided to do a whole 4th of July Cookout spread... KETOFIED!
The Hot Dogs in a bun... WITHOUT the Carbs! (PS they were grass fed all beef hot dogs)
The Cheeseburgers in a bun... WITHOUT the Carbs!
Fauxtato Salad (cauliflower)... WITHOUT the Carbs!
BBQ Chicken... WITHOUT the Carbs!
and of course we had the granddaddy dessert...
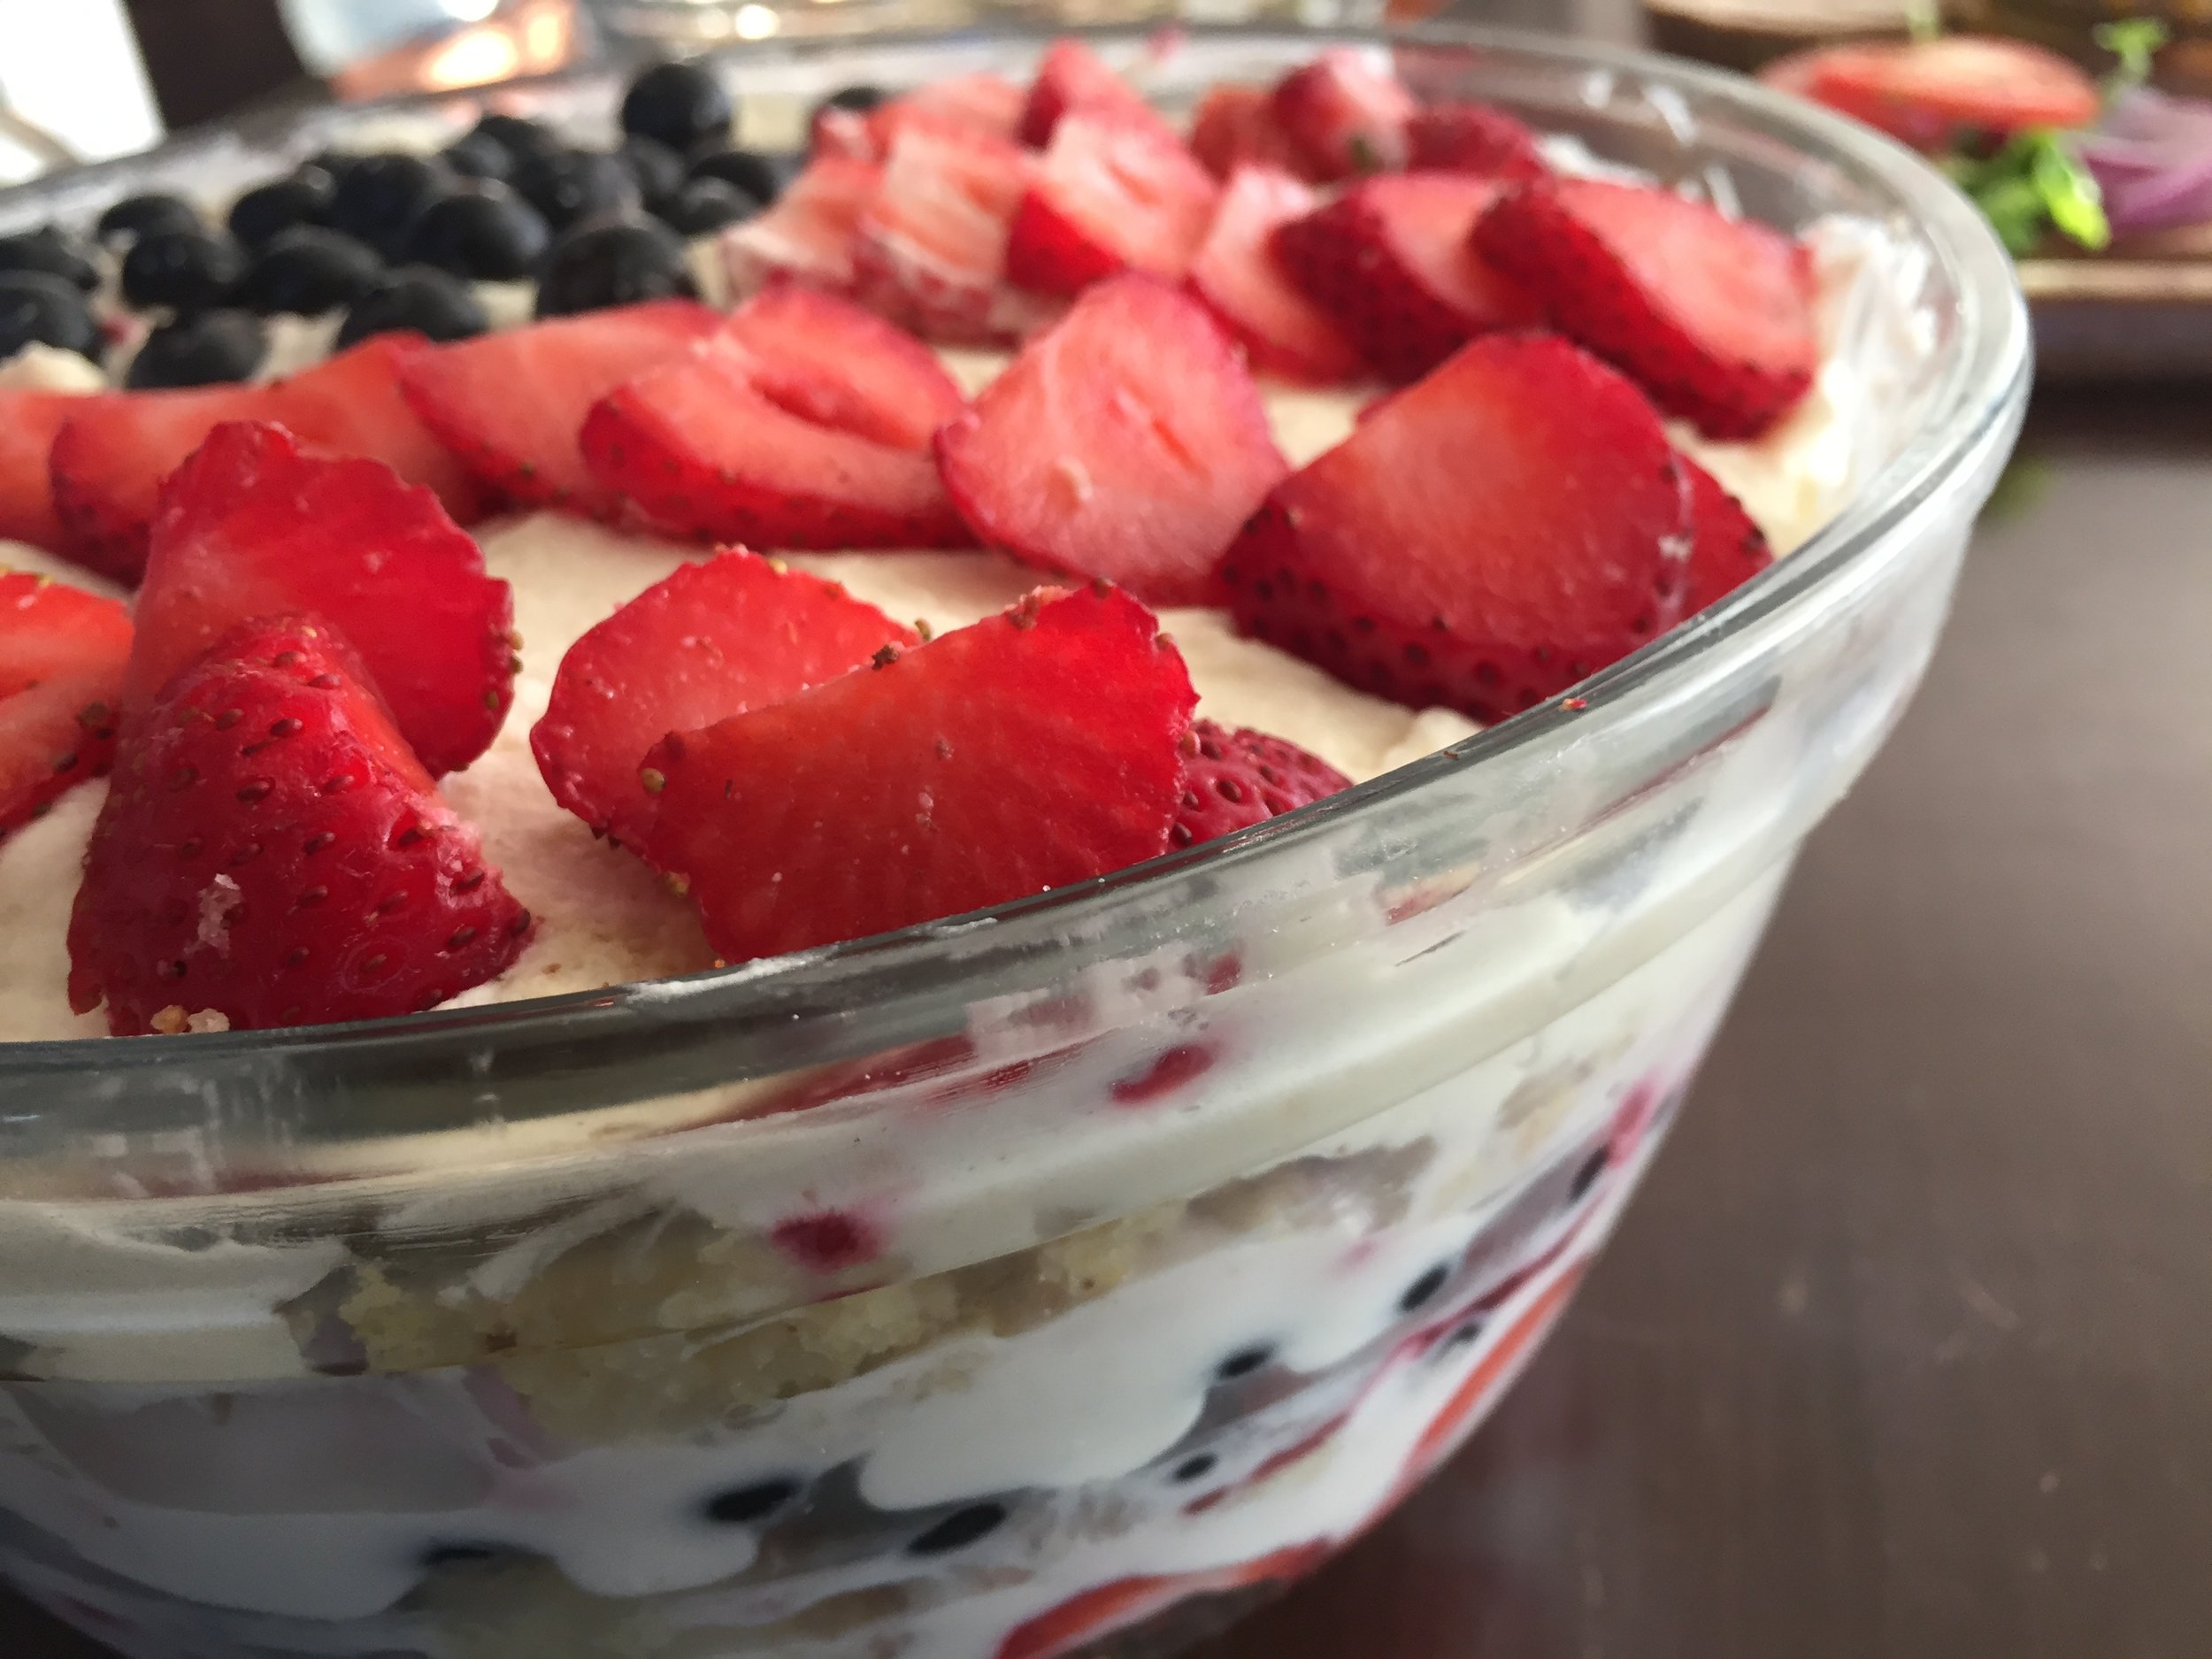
The Berries & Cream Red, White and Blue Trifle... WITHOUT the Carbs, the Grains, the Flour, the Sugar.
I had some guests staying with me this week and while everyone loved the food I could tell... all eyes were on the trifle from the second I pulled it out of the fridge. It was just a mountain of red white and blue goodness. I probably could have done it in a nicer dish, but I'm a single guy in his 20s... I don't have a nicer dish. Woops
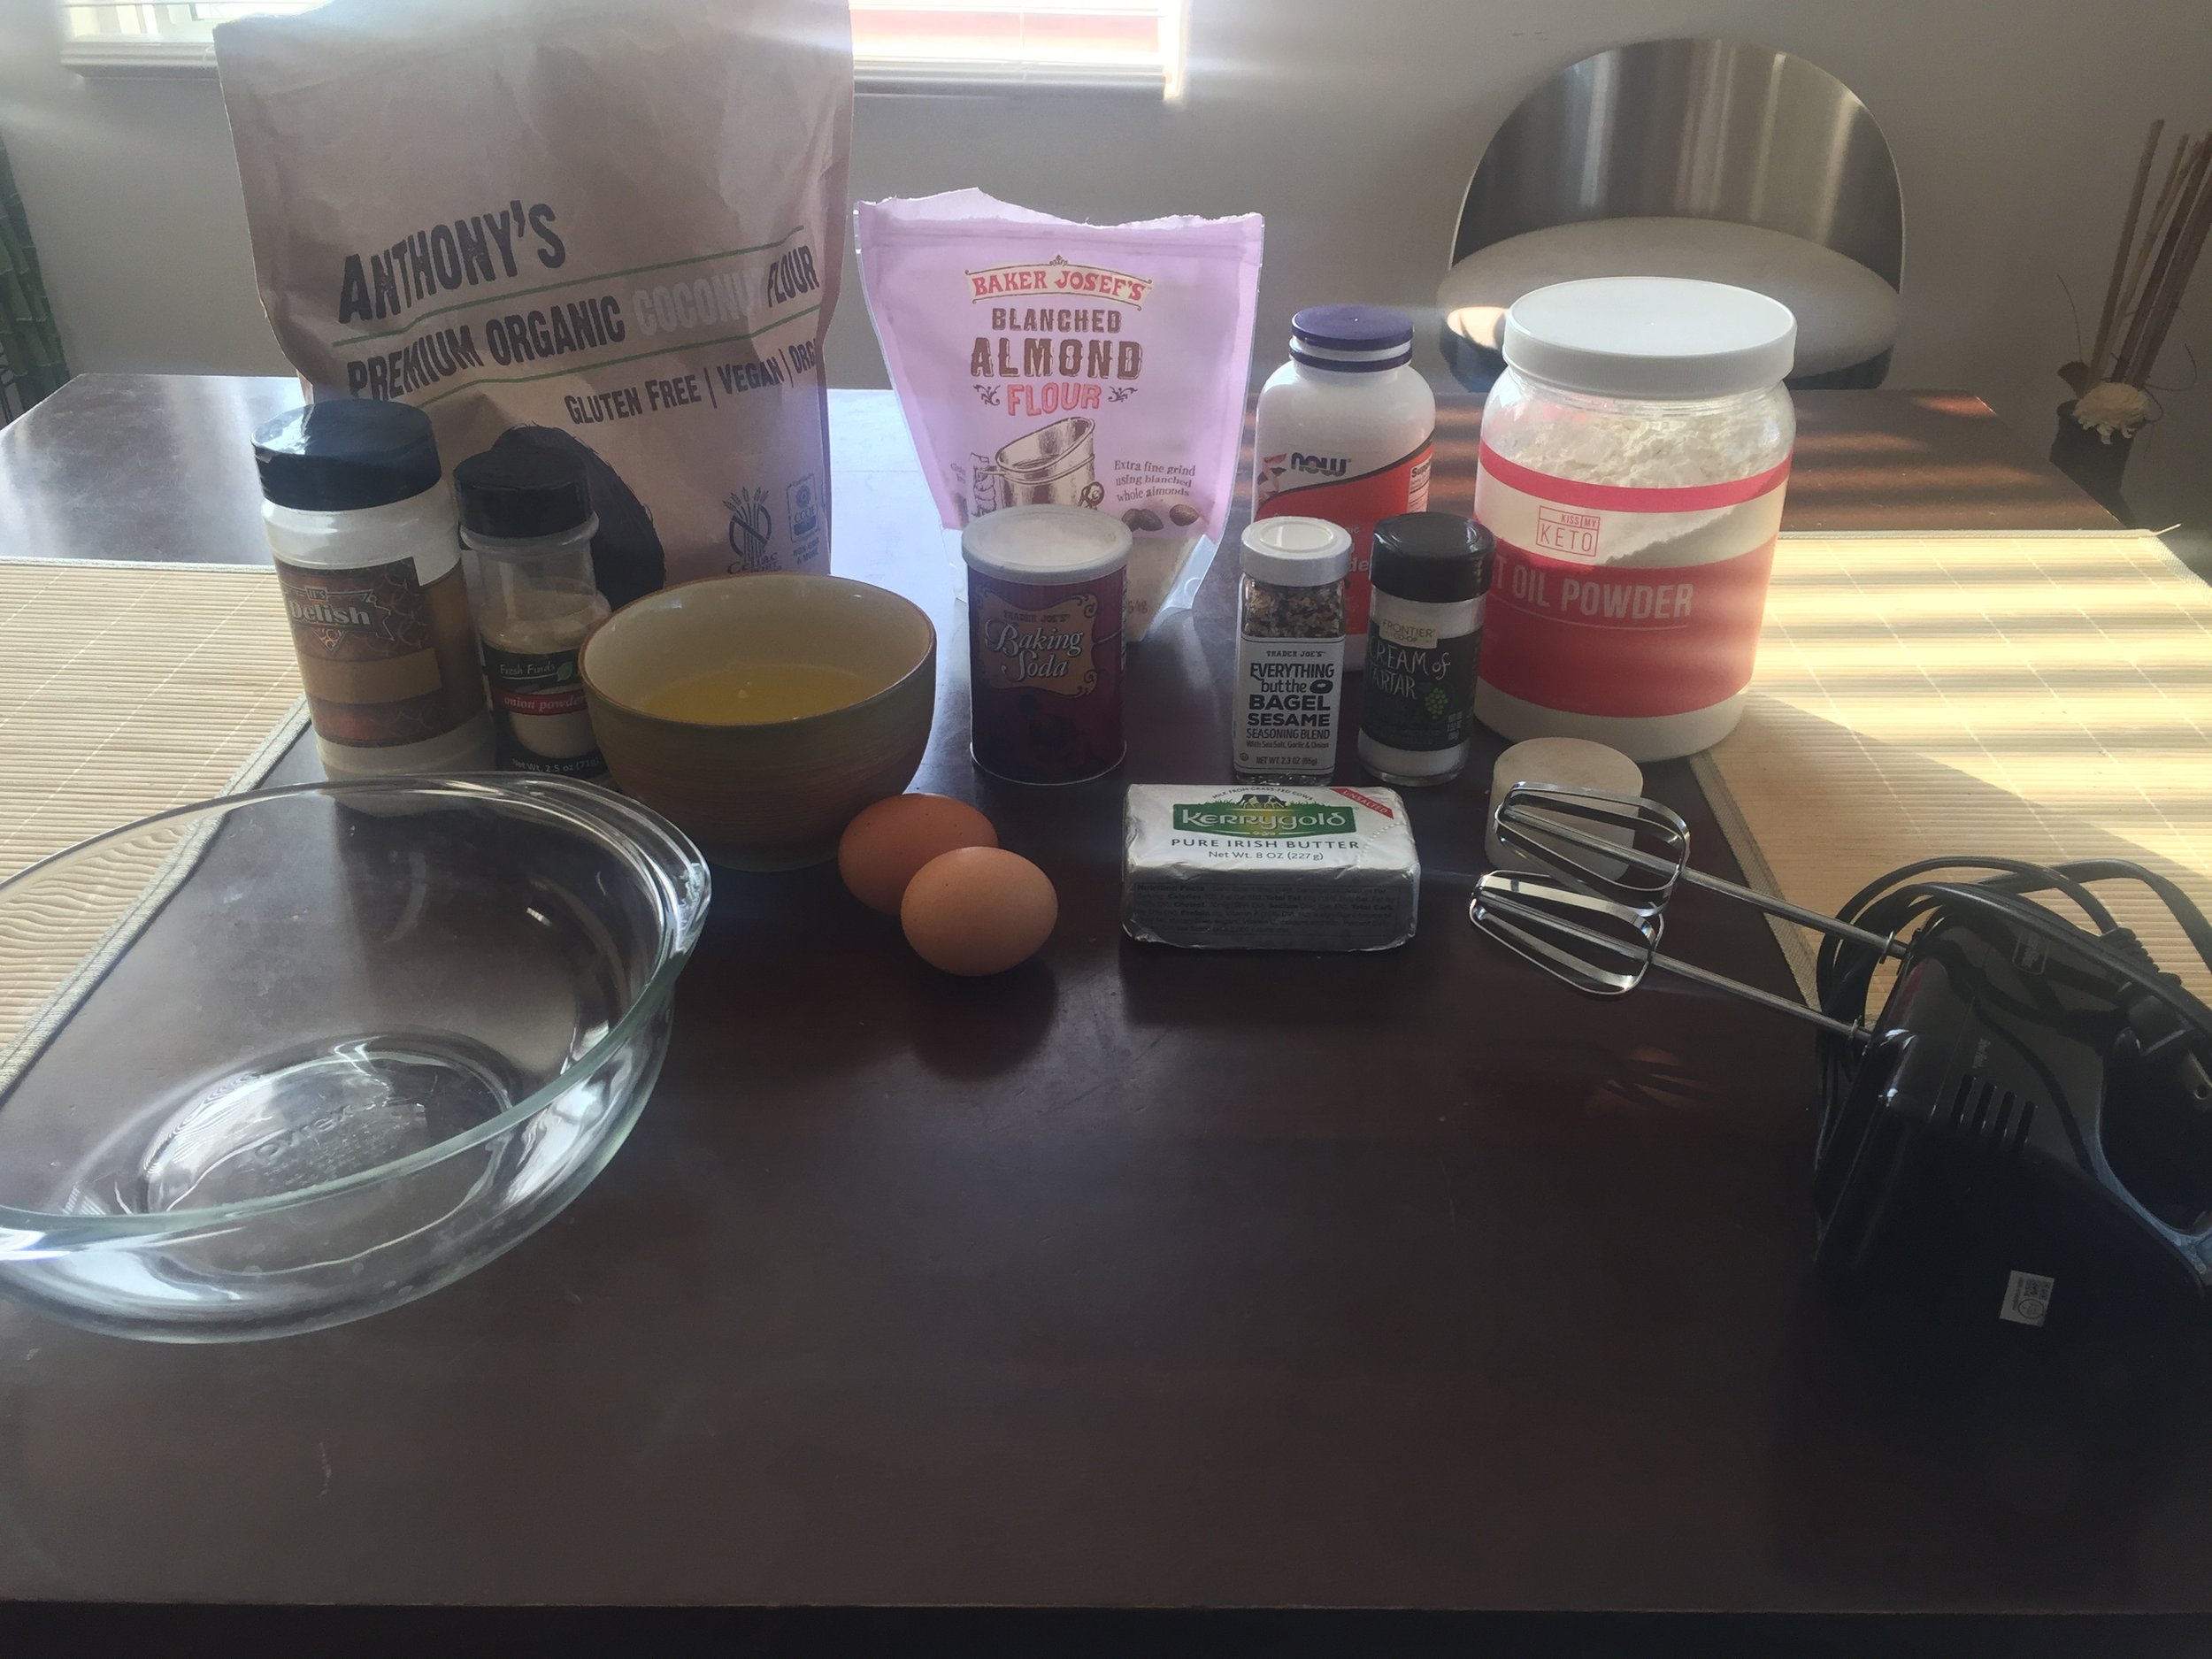
So let's get down to the ingredient list...
The Pound Cake
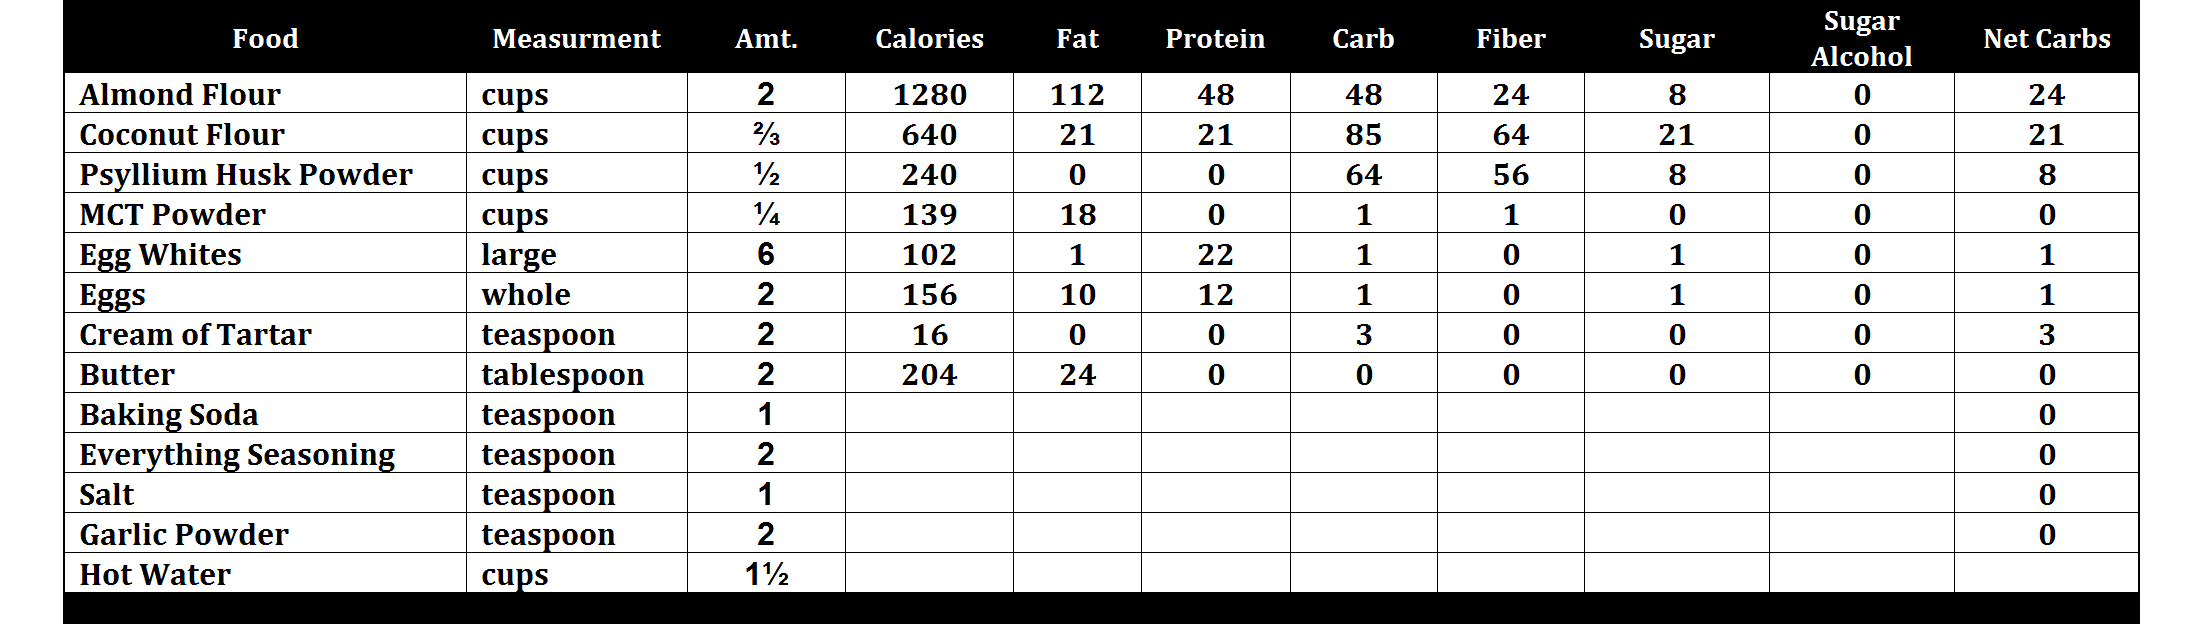
- 2 cups Almond Flour
- ½ cup Coconut Flour
- 1 cup Erythritol
- 6 whole Eggs
- ½ cup Heavy Whipping Cream
- ¼ cup Butter
- 2 teaspoon Vanilla Extract
- 1 teaspoon Baking Powder
- 1 teaspoon Salt

Cheesecake Filling
- 1 cup Heavy Cream
- 8 ounces Whipped Cream Cheese
- ½ cup Erythritol (Confectionery)
- 1 teaspoon Vanilla

Note: notice the stiffness of the "peaks" and how the cream sticks to the handmixer. This is because we have a thick consistency which is important!
Raspberry Lemon Glaze
- 12 ounces Frozen Raspberries
- ¼ cup Erythritol
- ½ medium Lemon Juice

Remaining Ingredients
- 8 medium Fresh Strawberries
- ½ cup Fresh Blue Berries
The Steps...
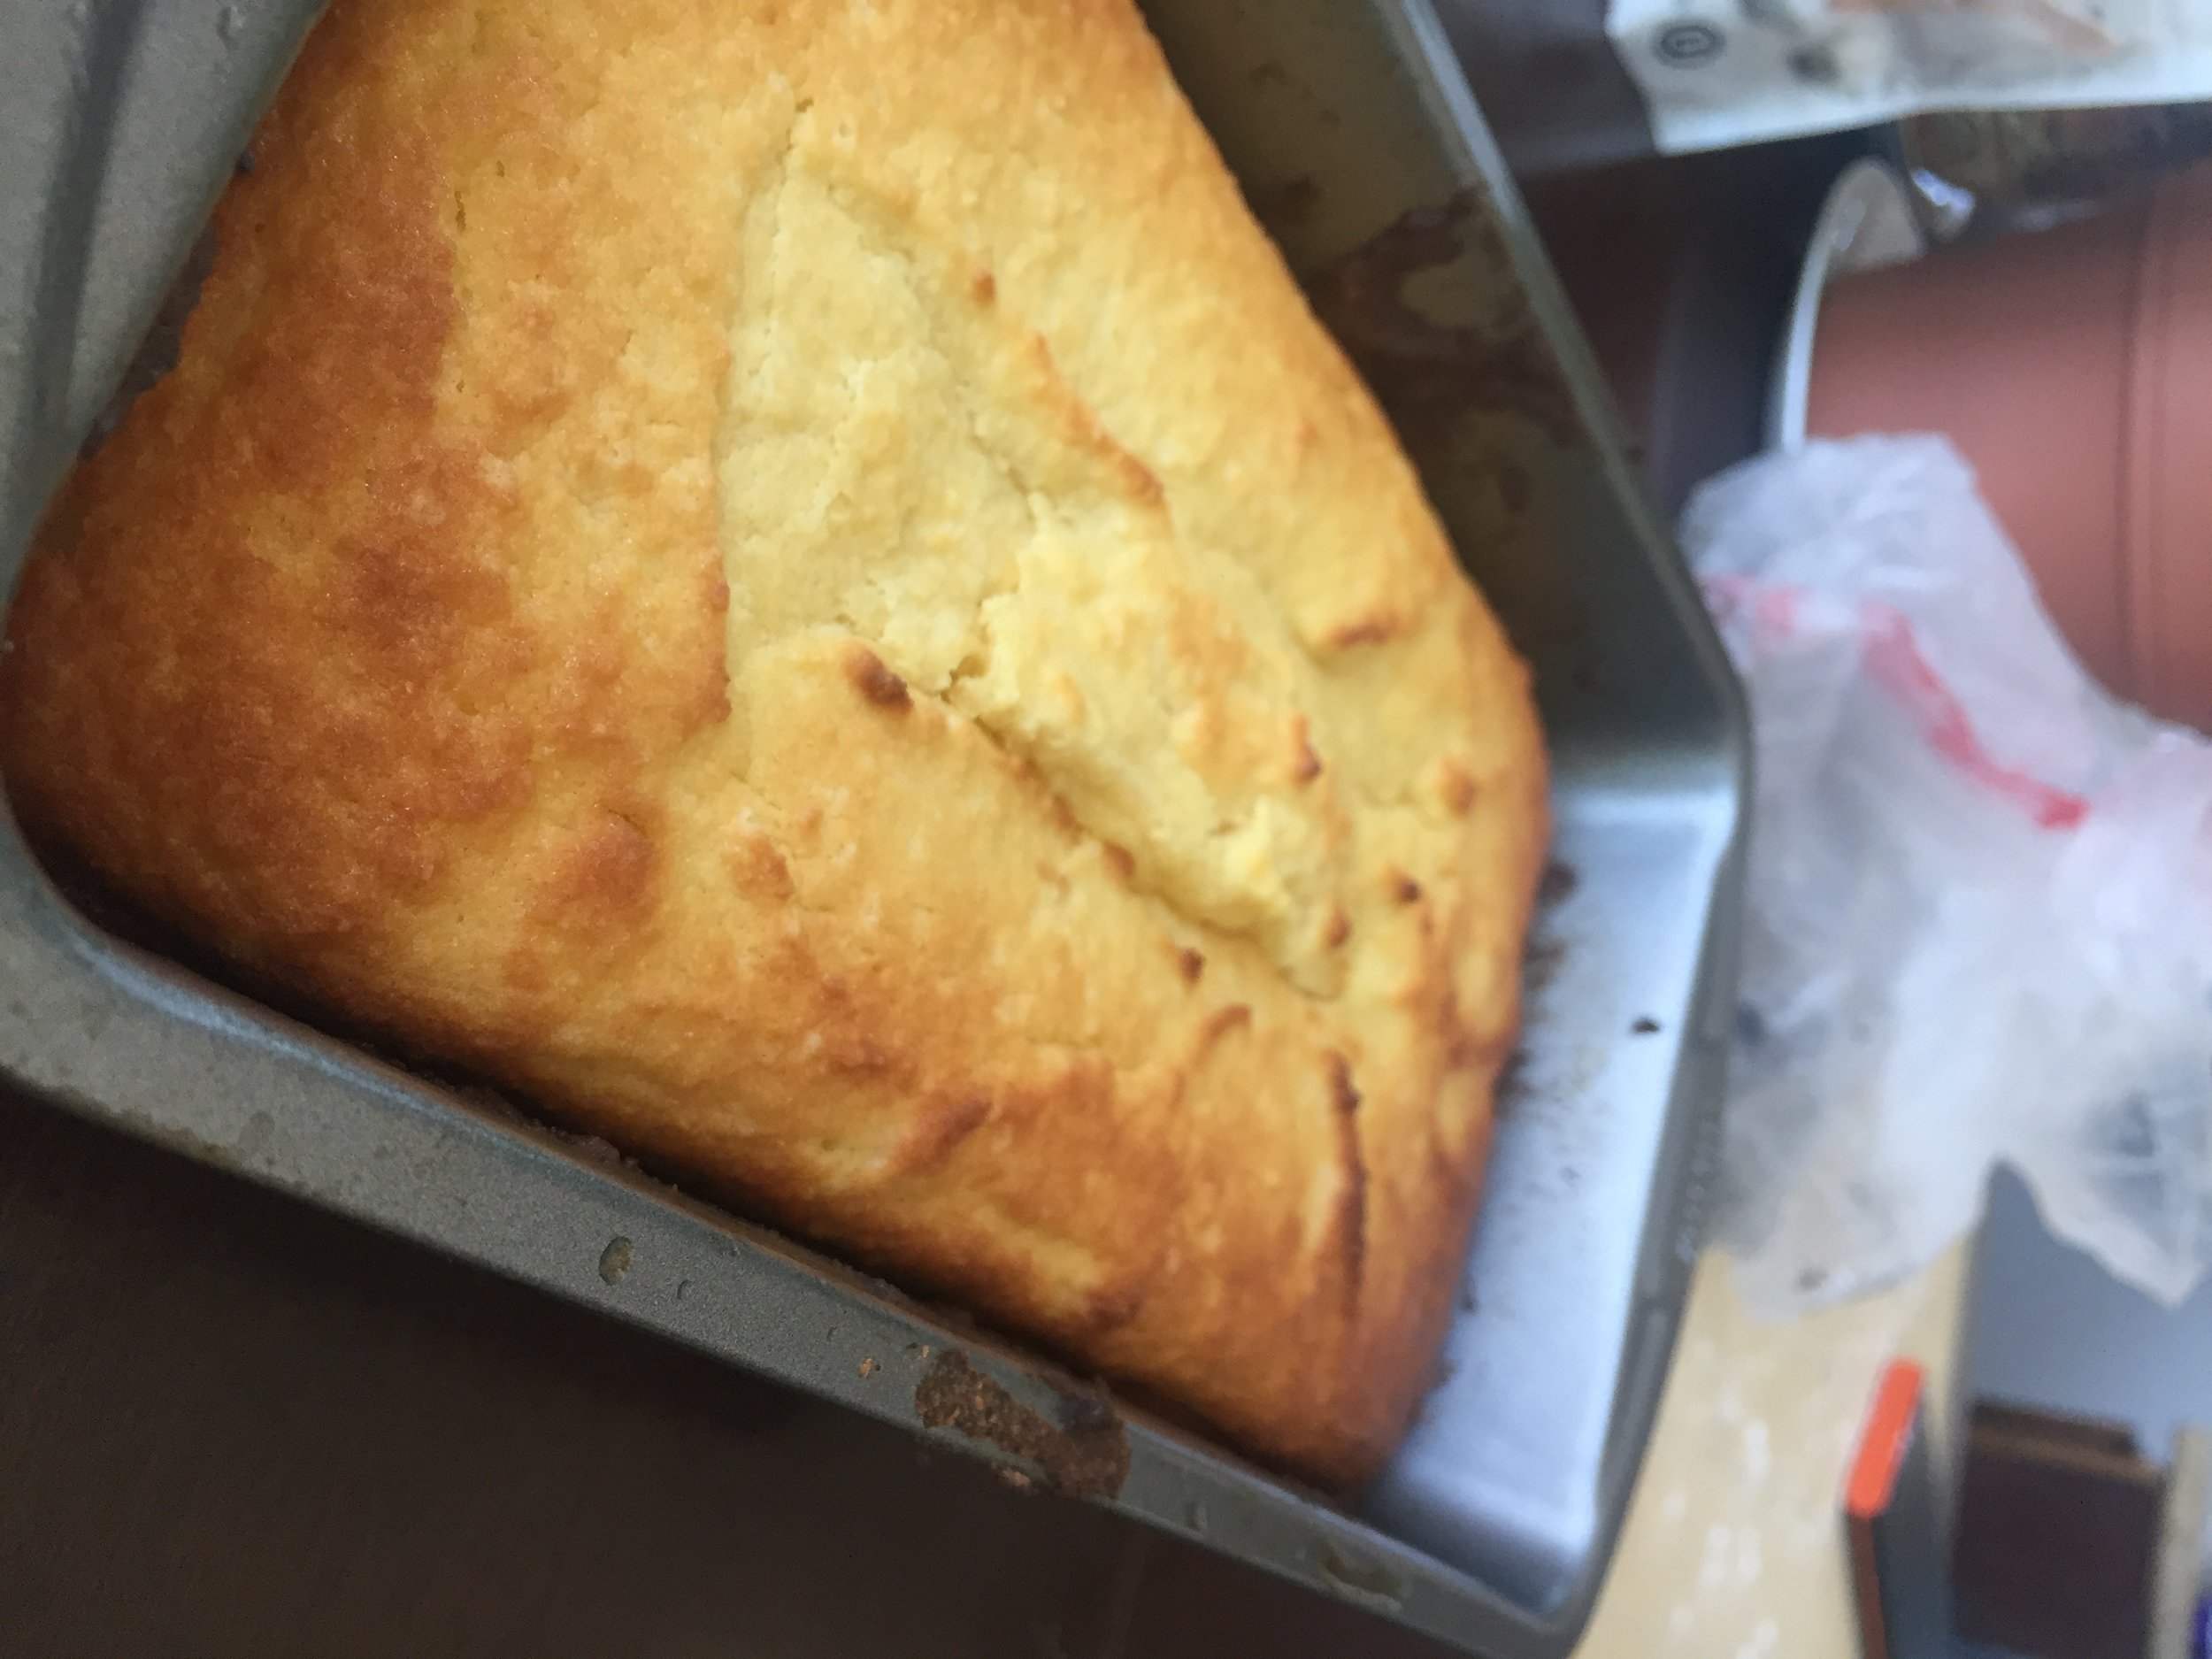
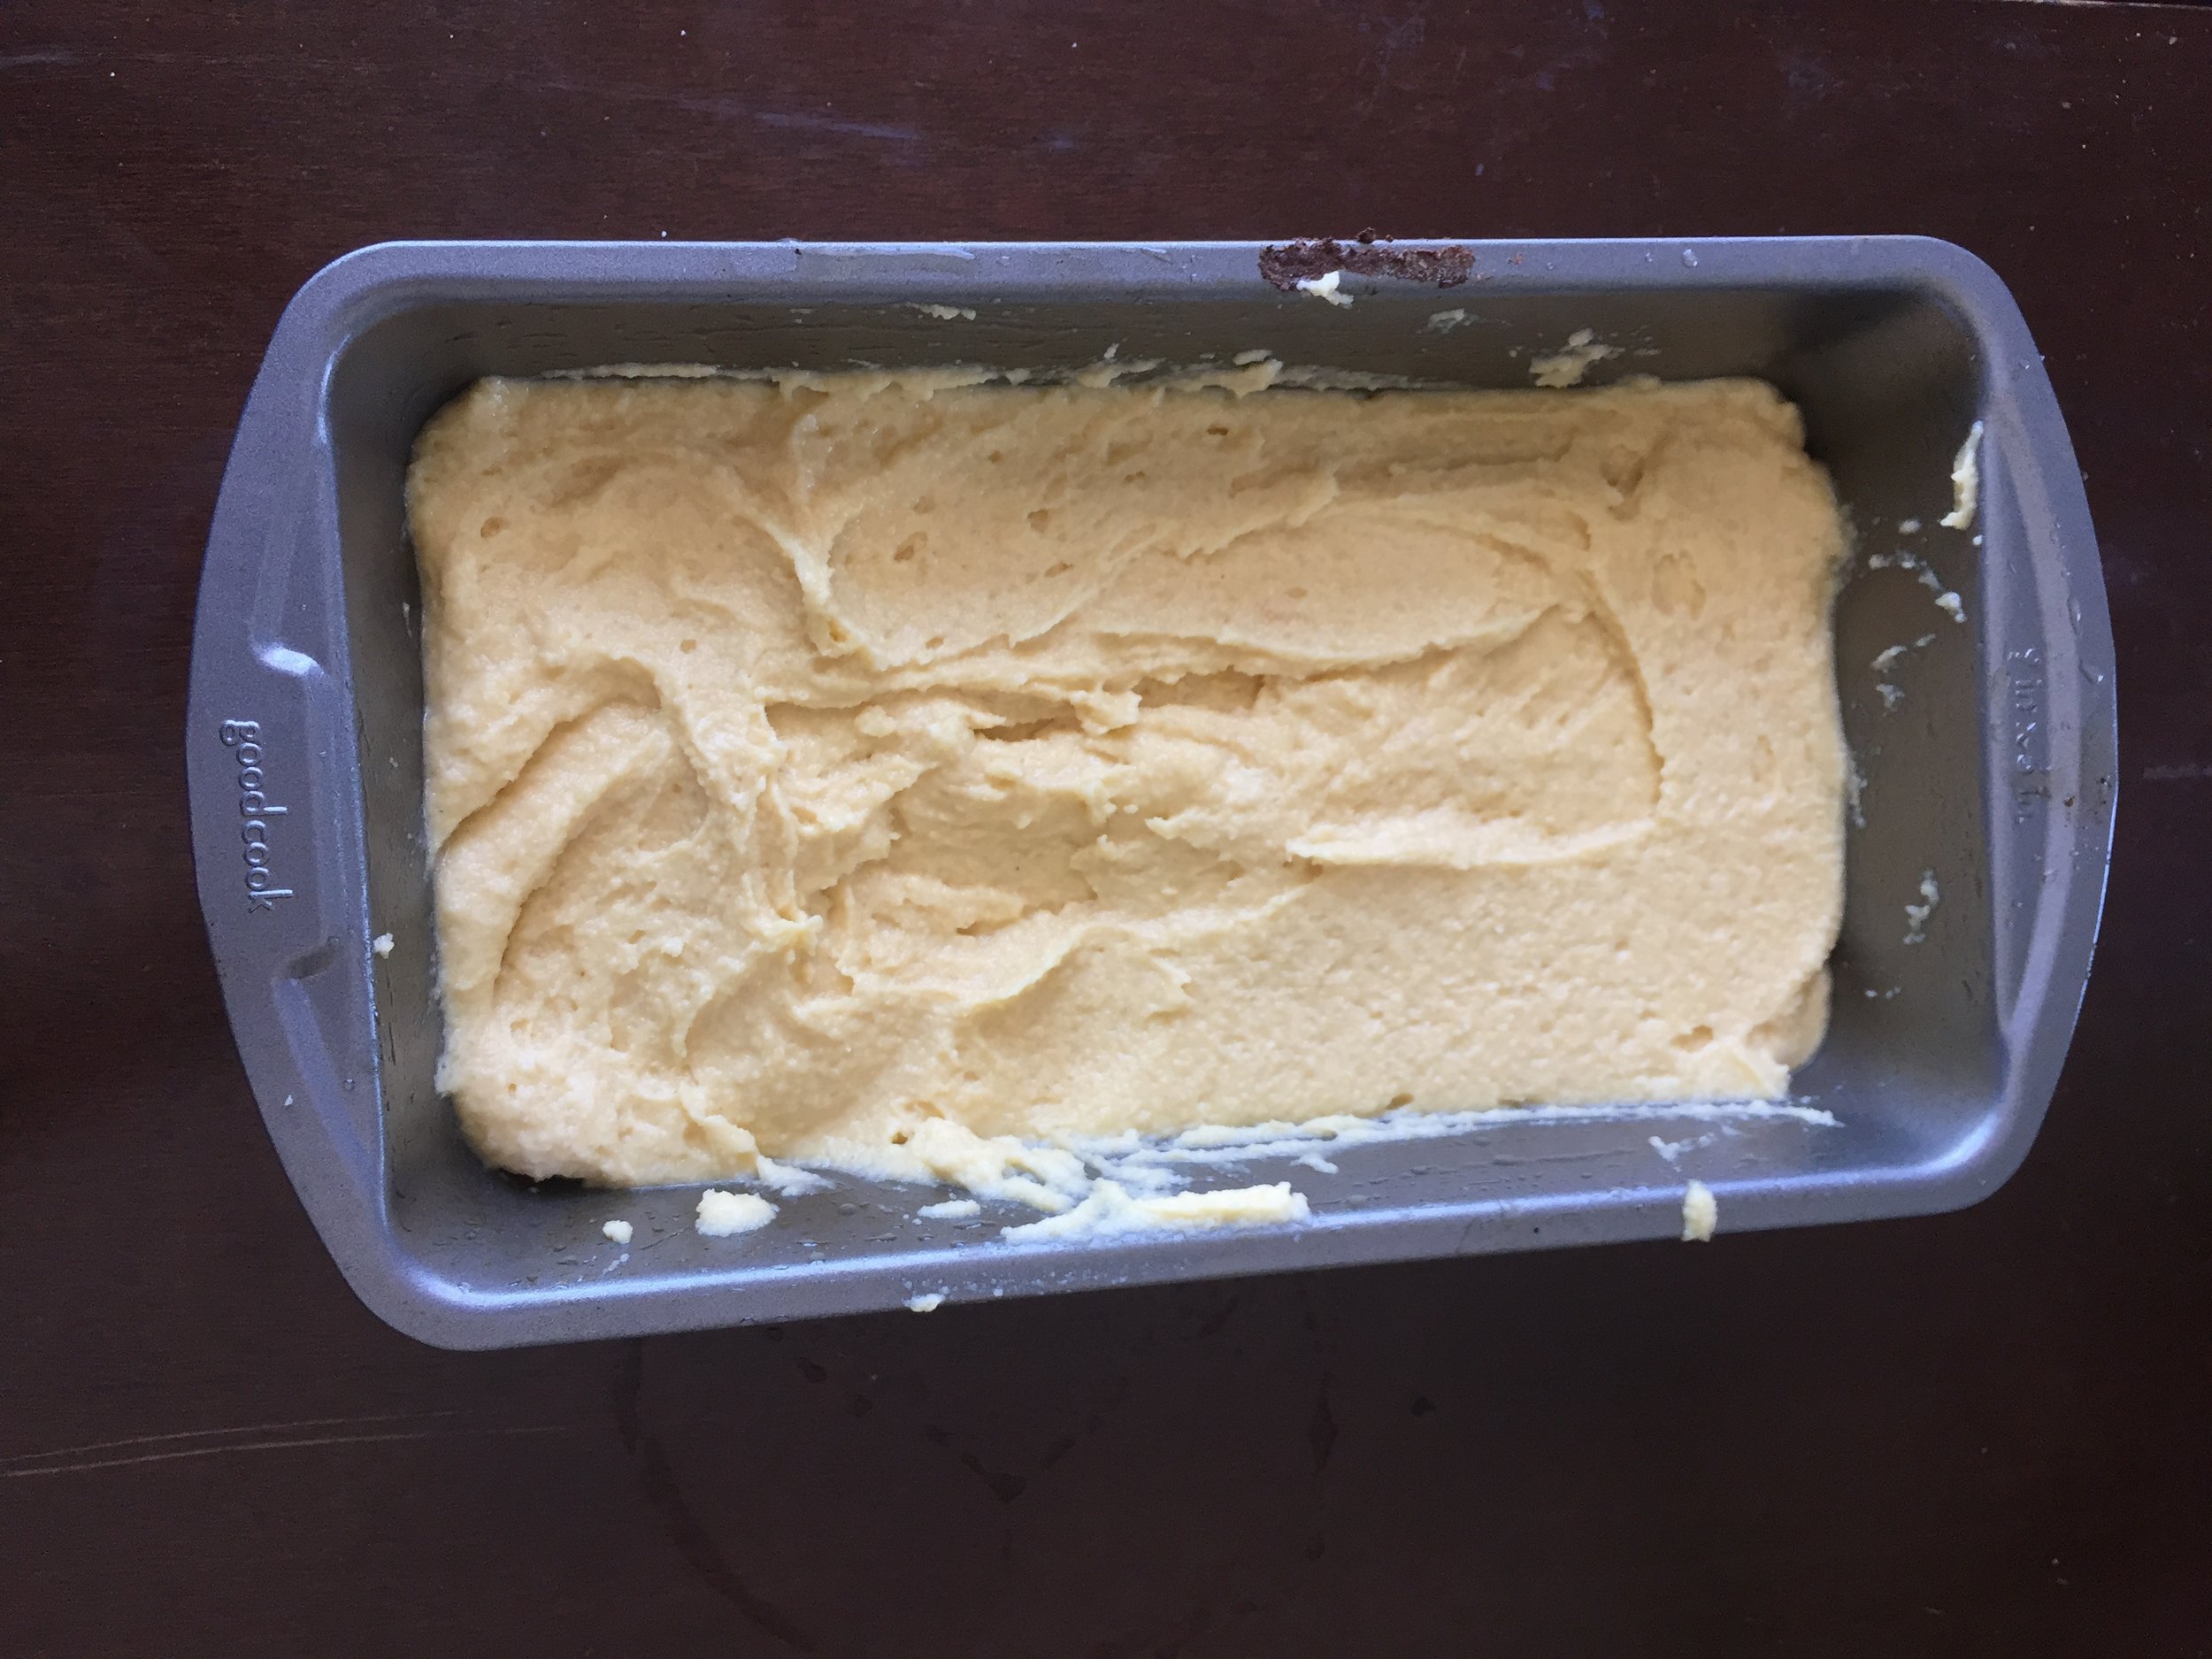
- The first step is to make the pound cake:
- Preheat Oven to 350F
- Mix all dry ingredients: Almond Flour, Coconut Flour, Erythritol, Baking Powder, Salt
- Mix in the wet ingredients using a hand mixer (or a spoon): Eggs, Heavy Whipping Cream, Butter, Vanilla Extract.
- Mix the batter with a spoon or hand mixer until no clumps or dry flour are left in the bowl and pour into an oven safe dish. I used a 9x5 pan.
- Bake for about 60-75 minutes.
- FULL DISCLOSURE NOTE: In the pictures below I messed up a bit... I took the cake out too early and it was still mushy in the middle. This is why the toothpick test is so essential! I forgot to do the toothpick test. So upon realizing the cake was still mushy in the middle I put it back in the oven for an additional 15-20 minutes, which was too long for the outside of the cake but necessary for the inside to get hot enough to cook. Moral of the story is to always check the center! The outside was a bit dark, not burnt or ruined, but not the golden brown that I would have liked. We'll get 'em next time!
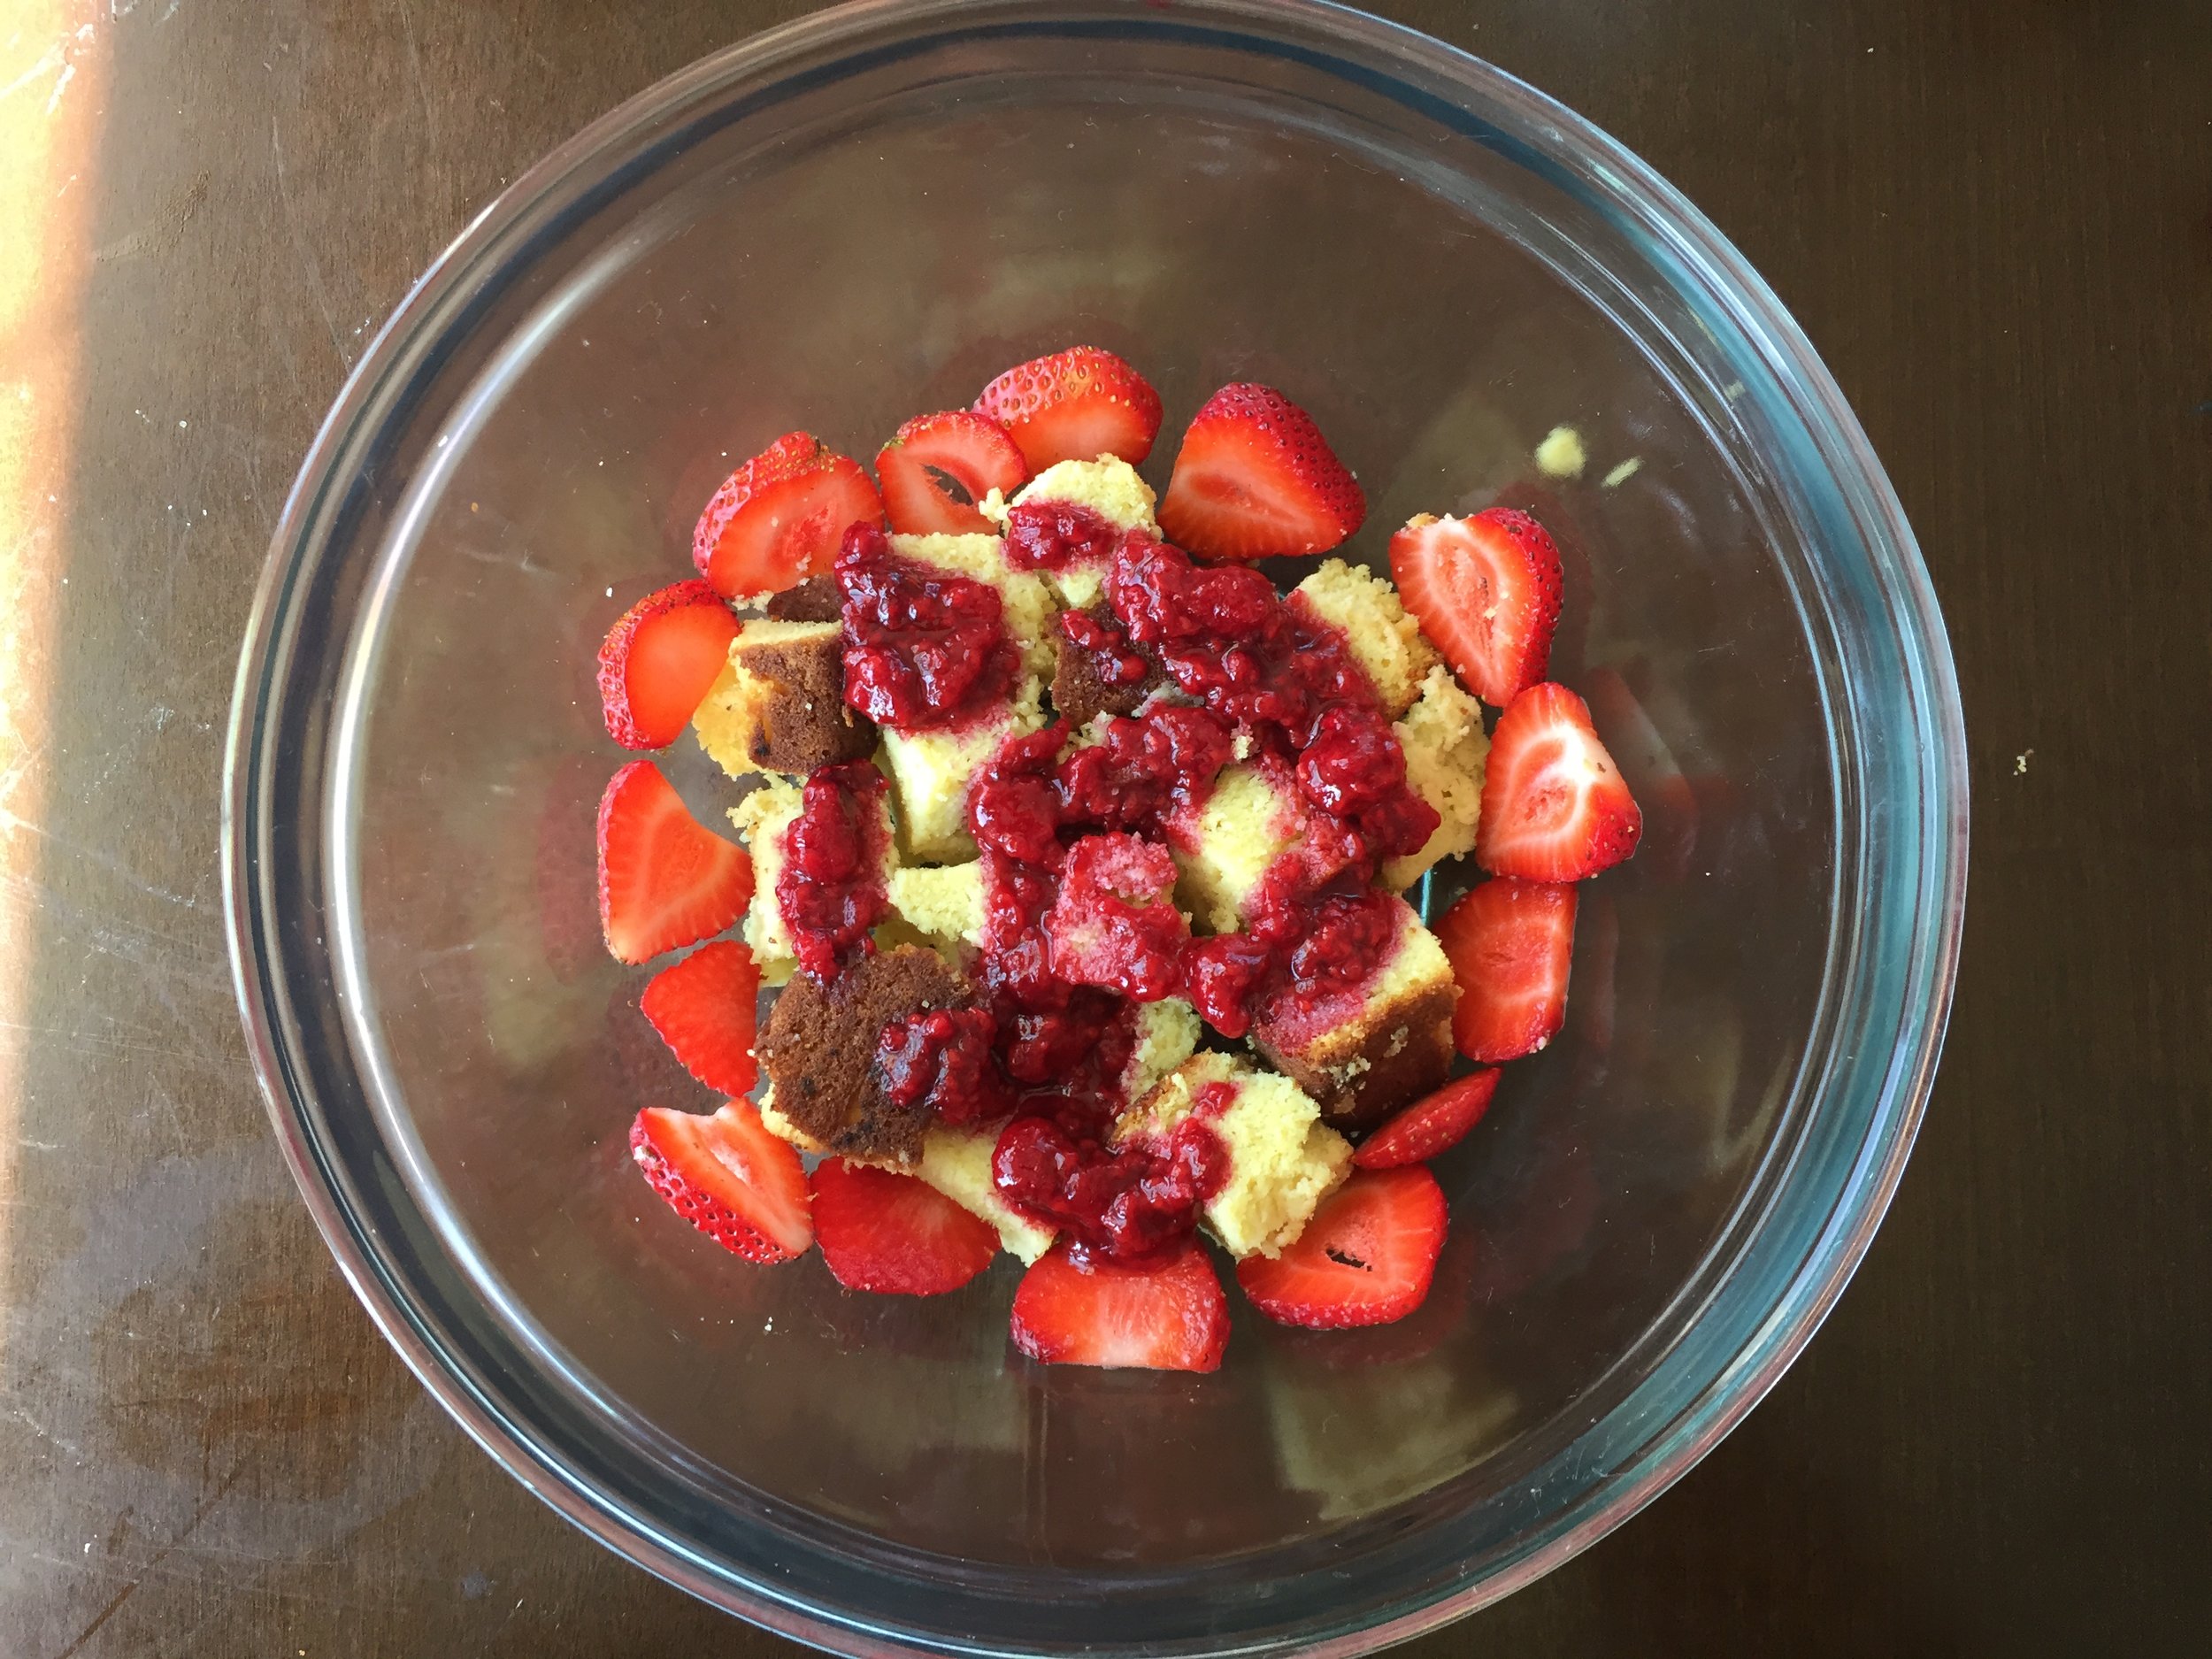
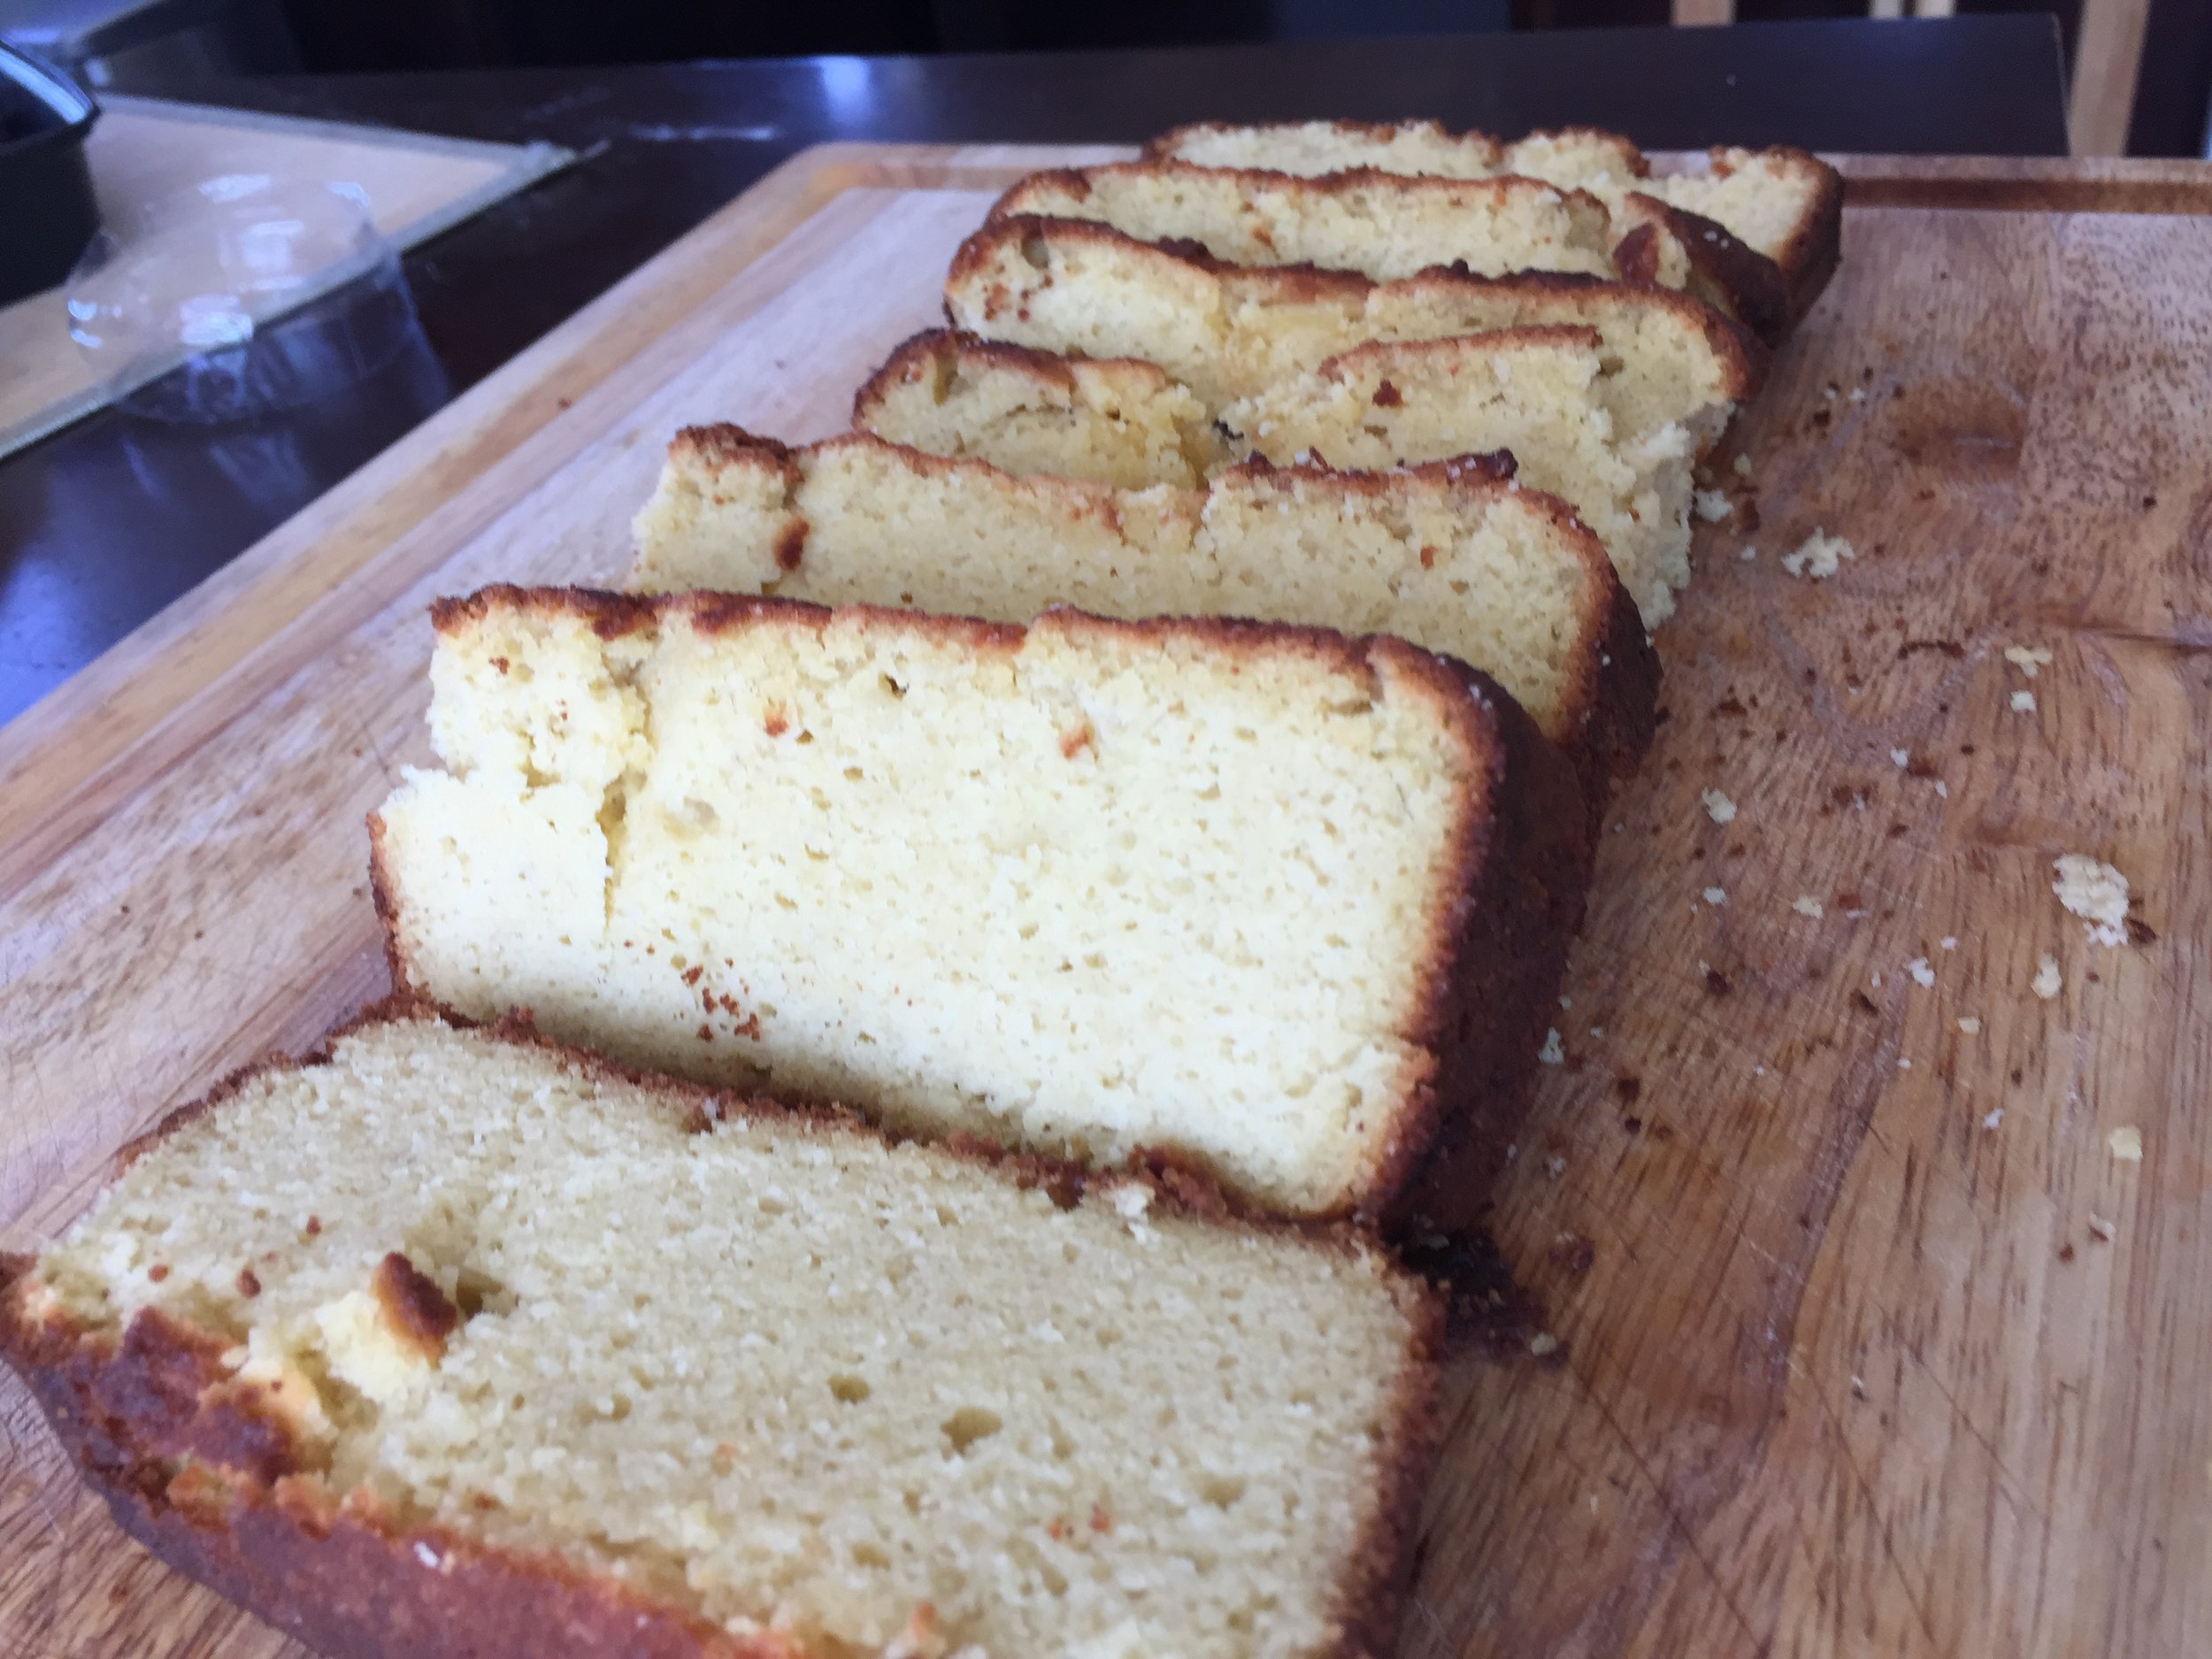
- Remove from the pan and allow it to cool to room temperature. Cut into cubes
- Next let's make the raspberry lemon filling! This is a sweet dish, so the sweet and sour of the raspberry lemon really cuts through the sweetness and provides an AWESOME variety of flavors as you're eating your way through a big old piece of this goodness
- In a sauce pan: add frozen raspberries, lemon juice and erythritol and let it simmer on medium-low (3 out of 10) for about 30-40 minutes.
- I usually like to start this right after the cake goes in the oven and let it simmer on the lowest setting until everything else is ready. This will really help thicken up the sauce.
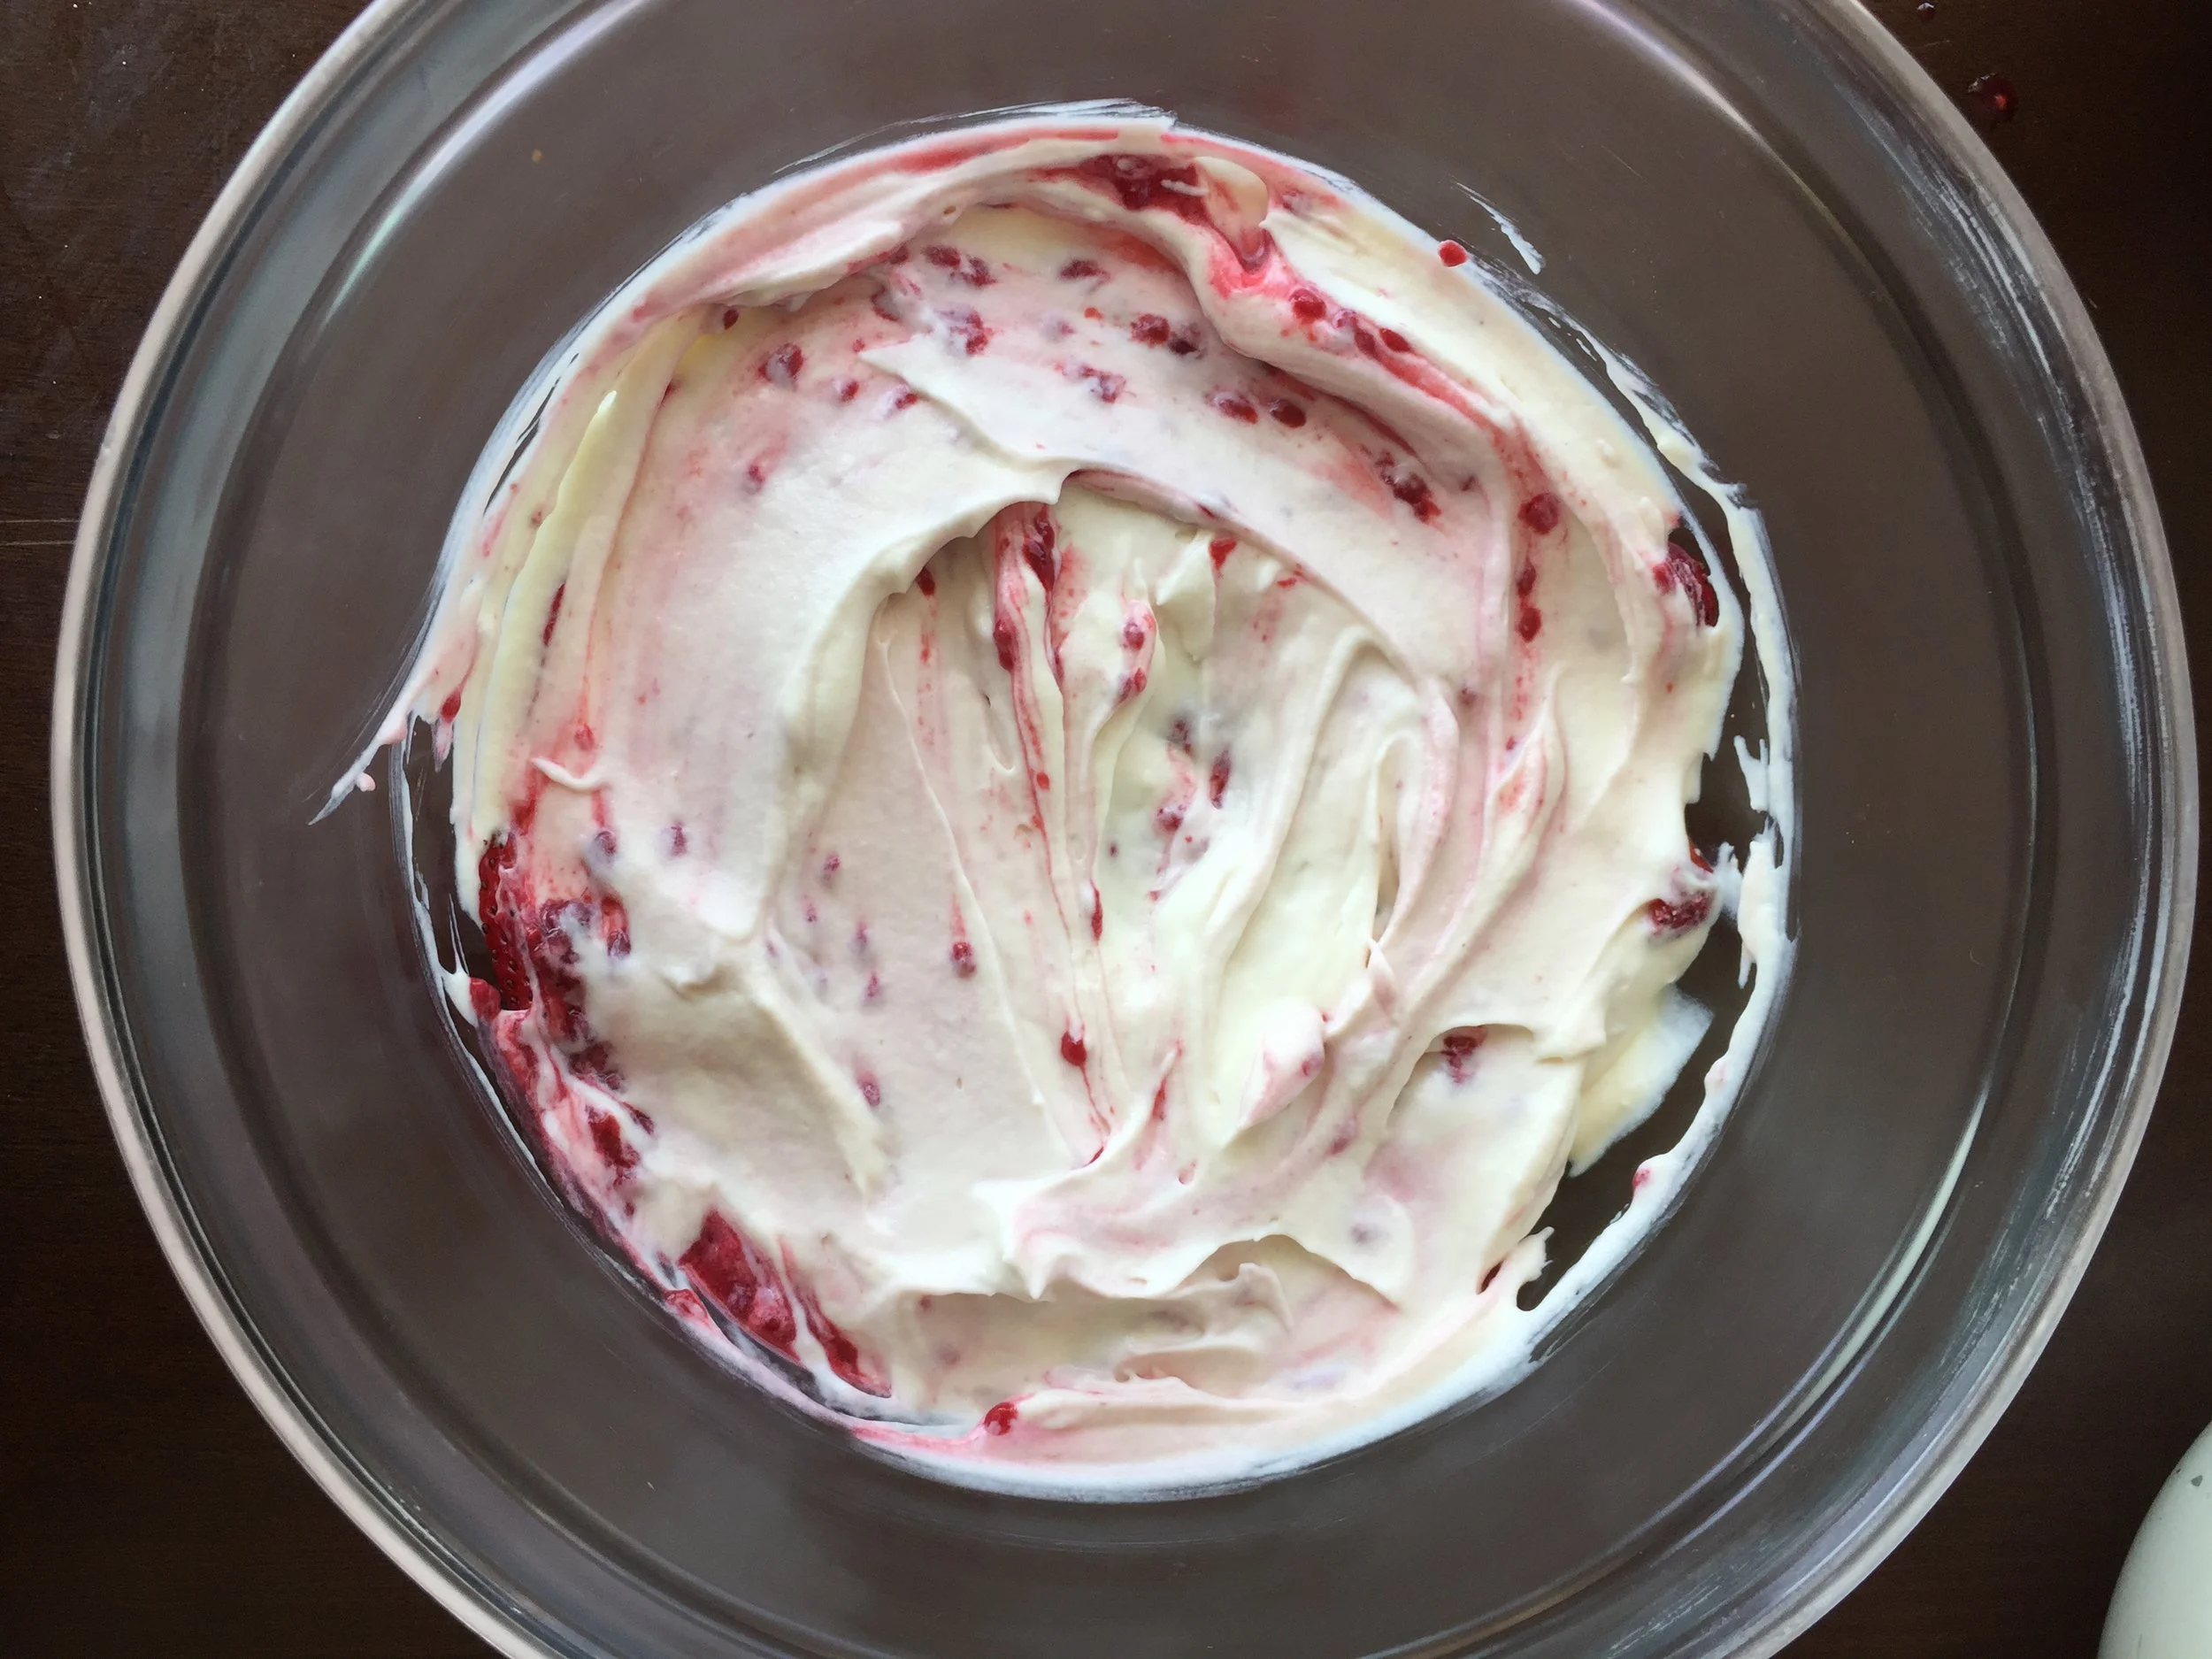
- While the Cake is cooling let's make the the cream cheese filling!
- In a large bowl we're going to make some sugar free whipped cream. Now this can be done by hand but it's far easier with a mixer. The particular mixer I have cost about 12 dollars on Amazon.
- Add in 1/2 cup of powdered/confectioners erythritol and begin mixing. This will take about a minute with the mixer and about 5-6 by hand depending on your intensity. FYI you can also buy sugar free whipped cream, but it's always better to make your own!!
- Once the Whipped Cream has stiff but fluffy peaks add in the whipped cream cheese and continue mixing until everything is thick and evenly mixed. We use whipped cream cheese because it helps for a very light texture that won't be too heavy on the stomach.
- Now it's time to craft this beast! As previously stated they do make nice trifle dishes, but whatever I used a clear bowl and it still tasted great. This isn't the Food Network we don't need to be fancy, we just want it to taste good!
- Prep Work: Dice the cake into squares (roughly a 1x1) cube and slice your strawberries into thin flat pieces (so they can rest against the side of the dish)
- Start Stacking!
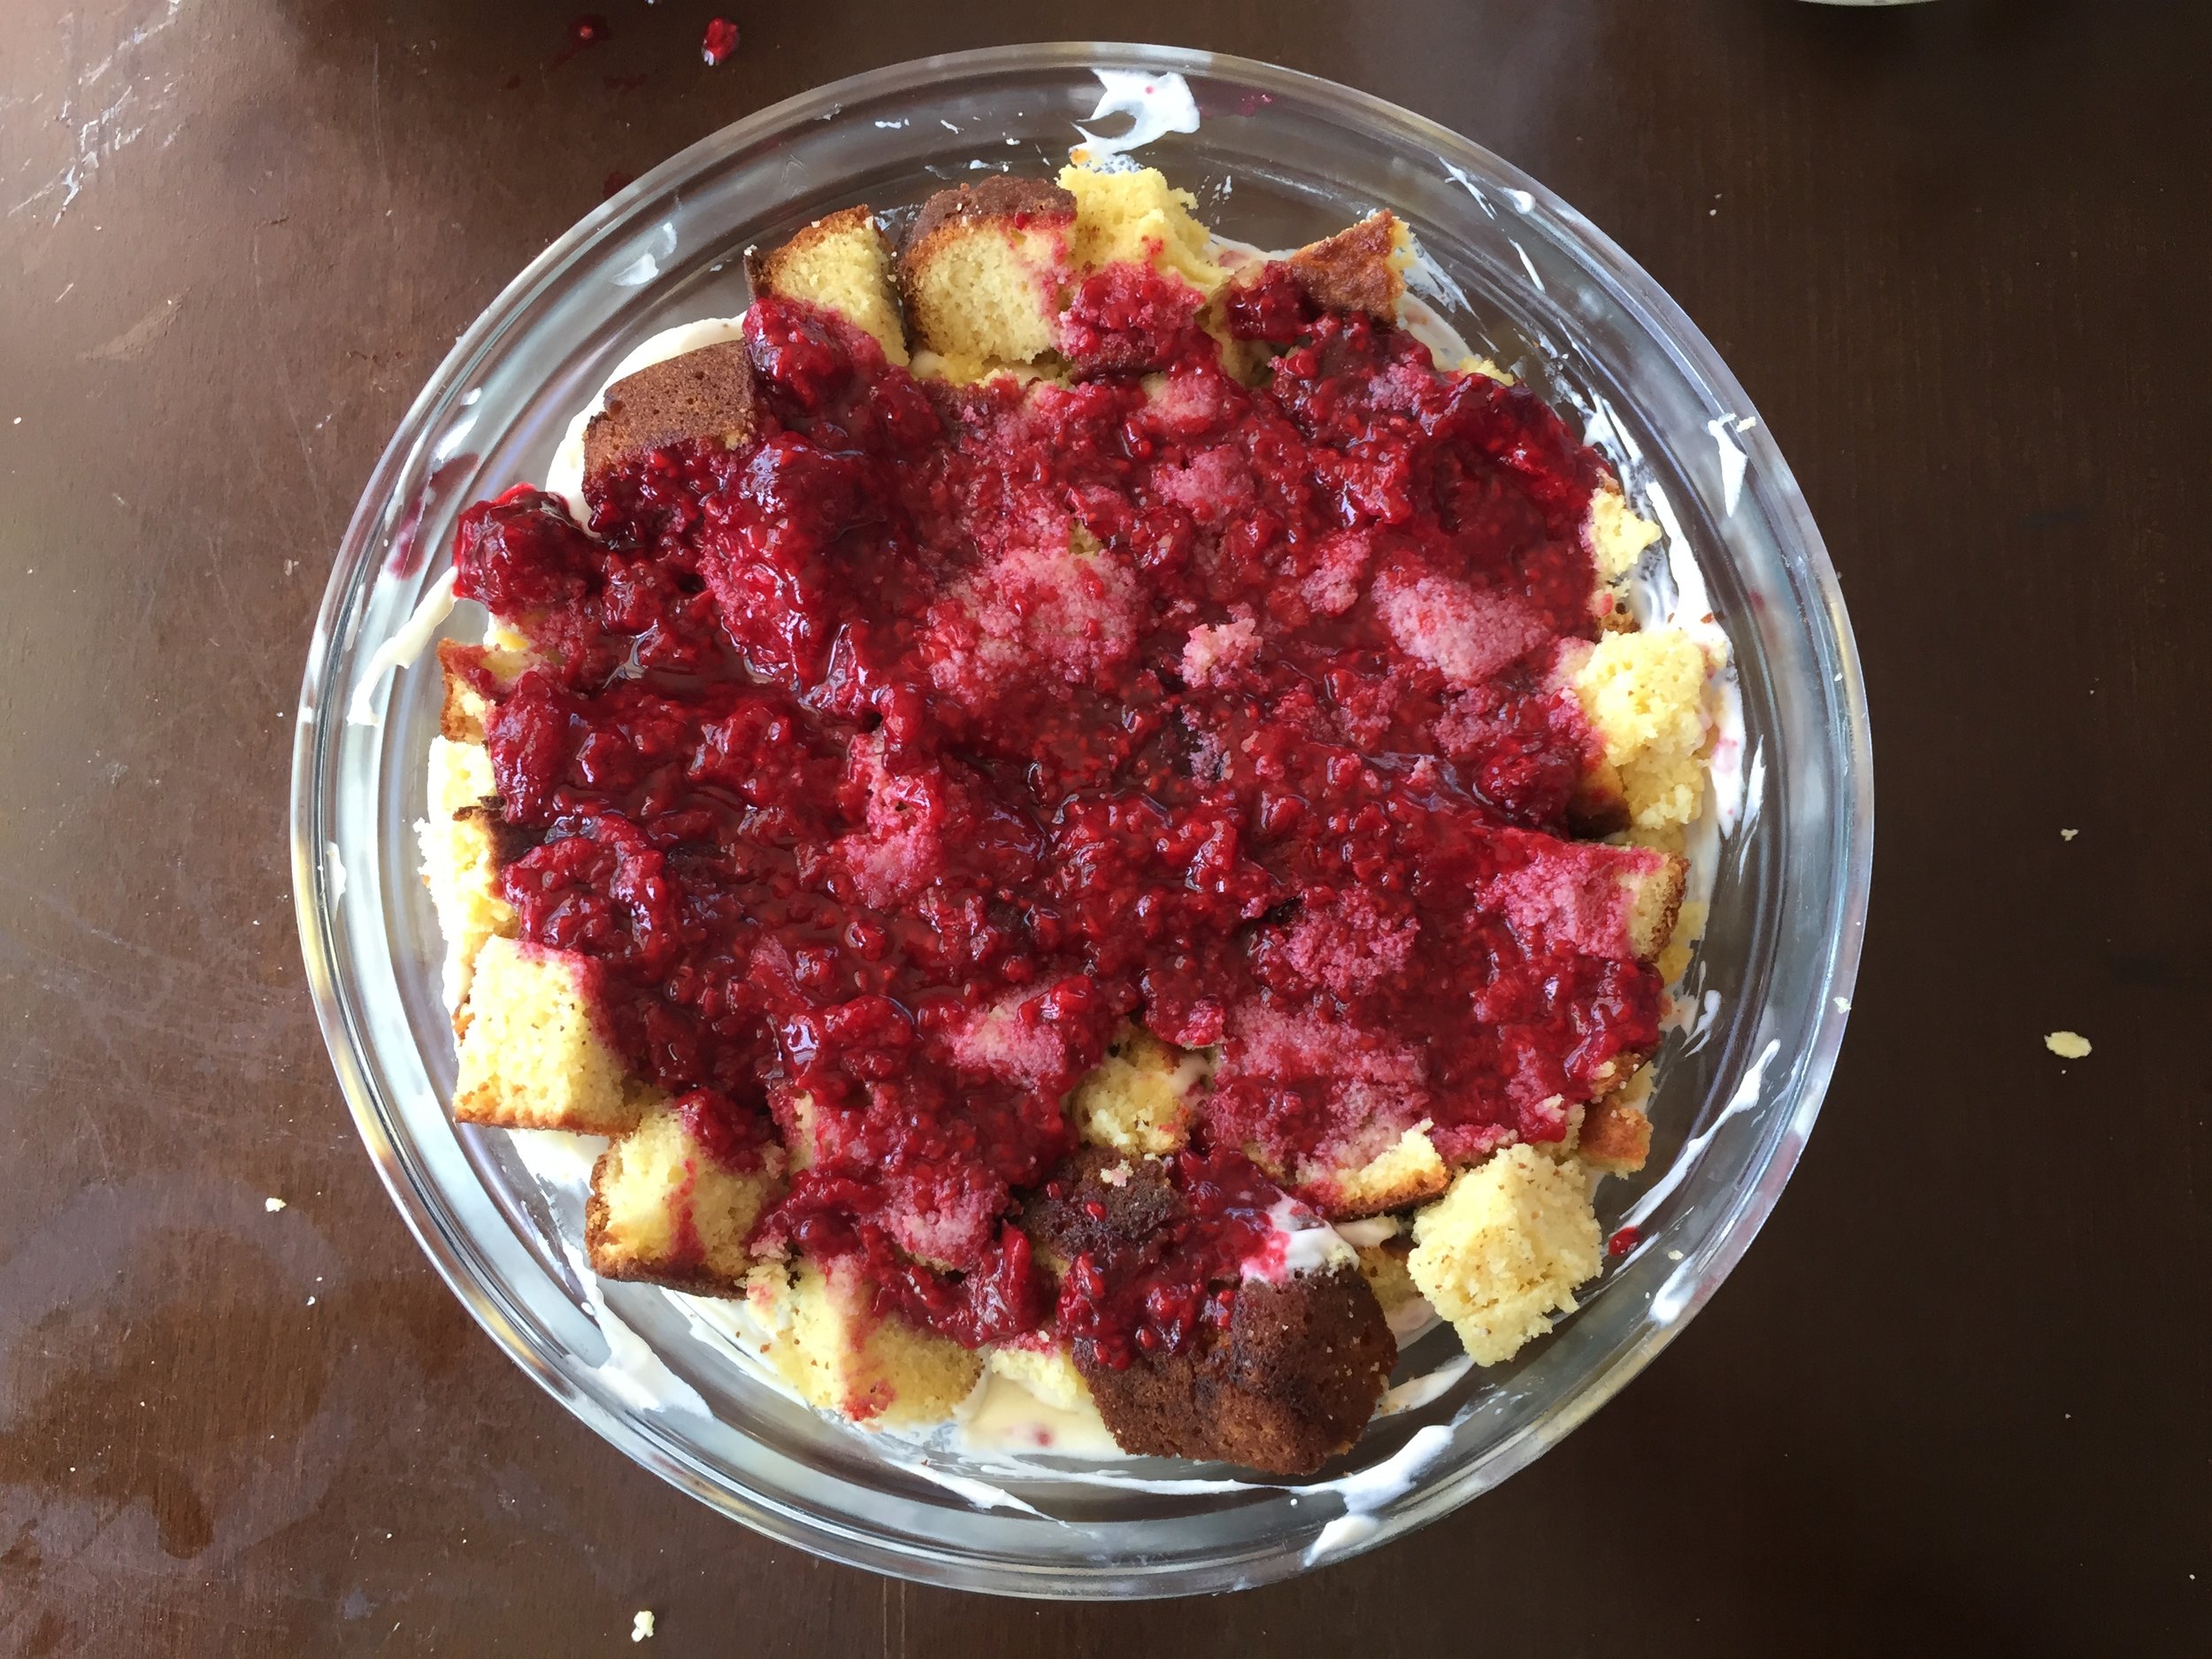
- Layer 1: Cake > Raspberry > ring of strawberries > cream cheese whip
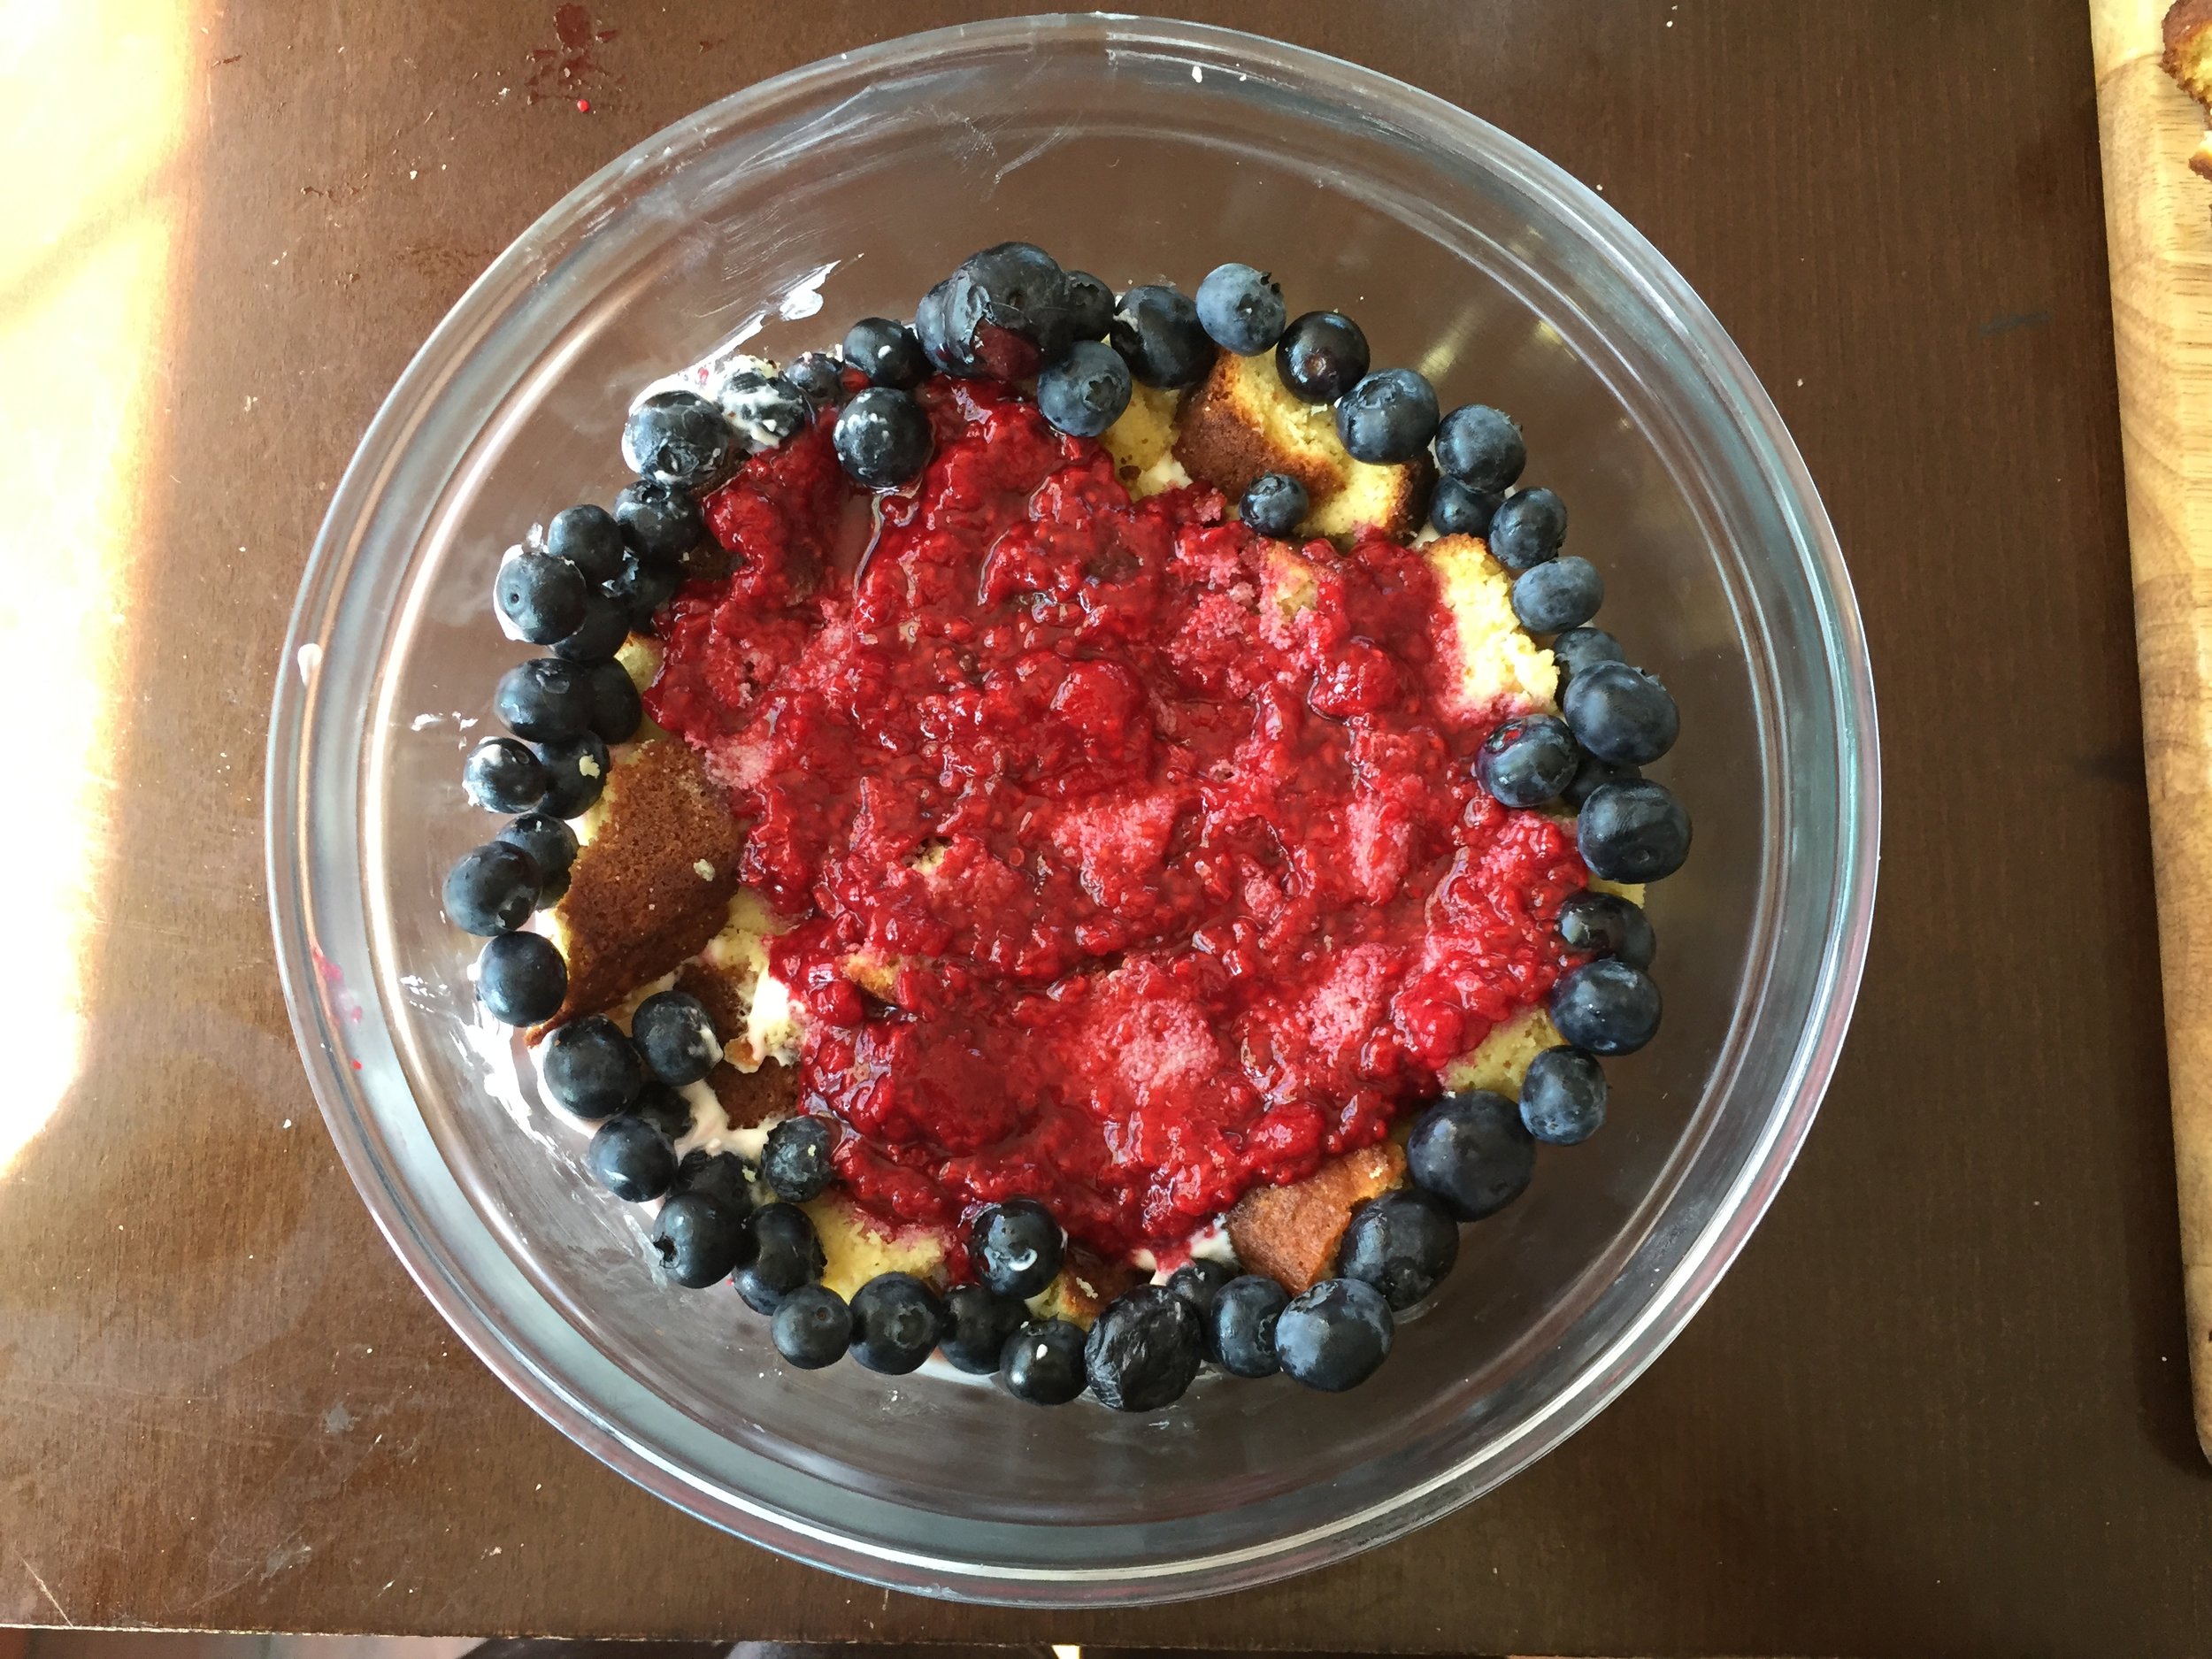
- Layer 2: Cake > Raspberry > ring of blueberries > cream cheese whip
- Layer 3: Cake > Raspberry > ring of strawberries > cream cheese whip
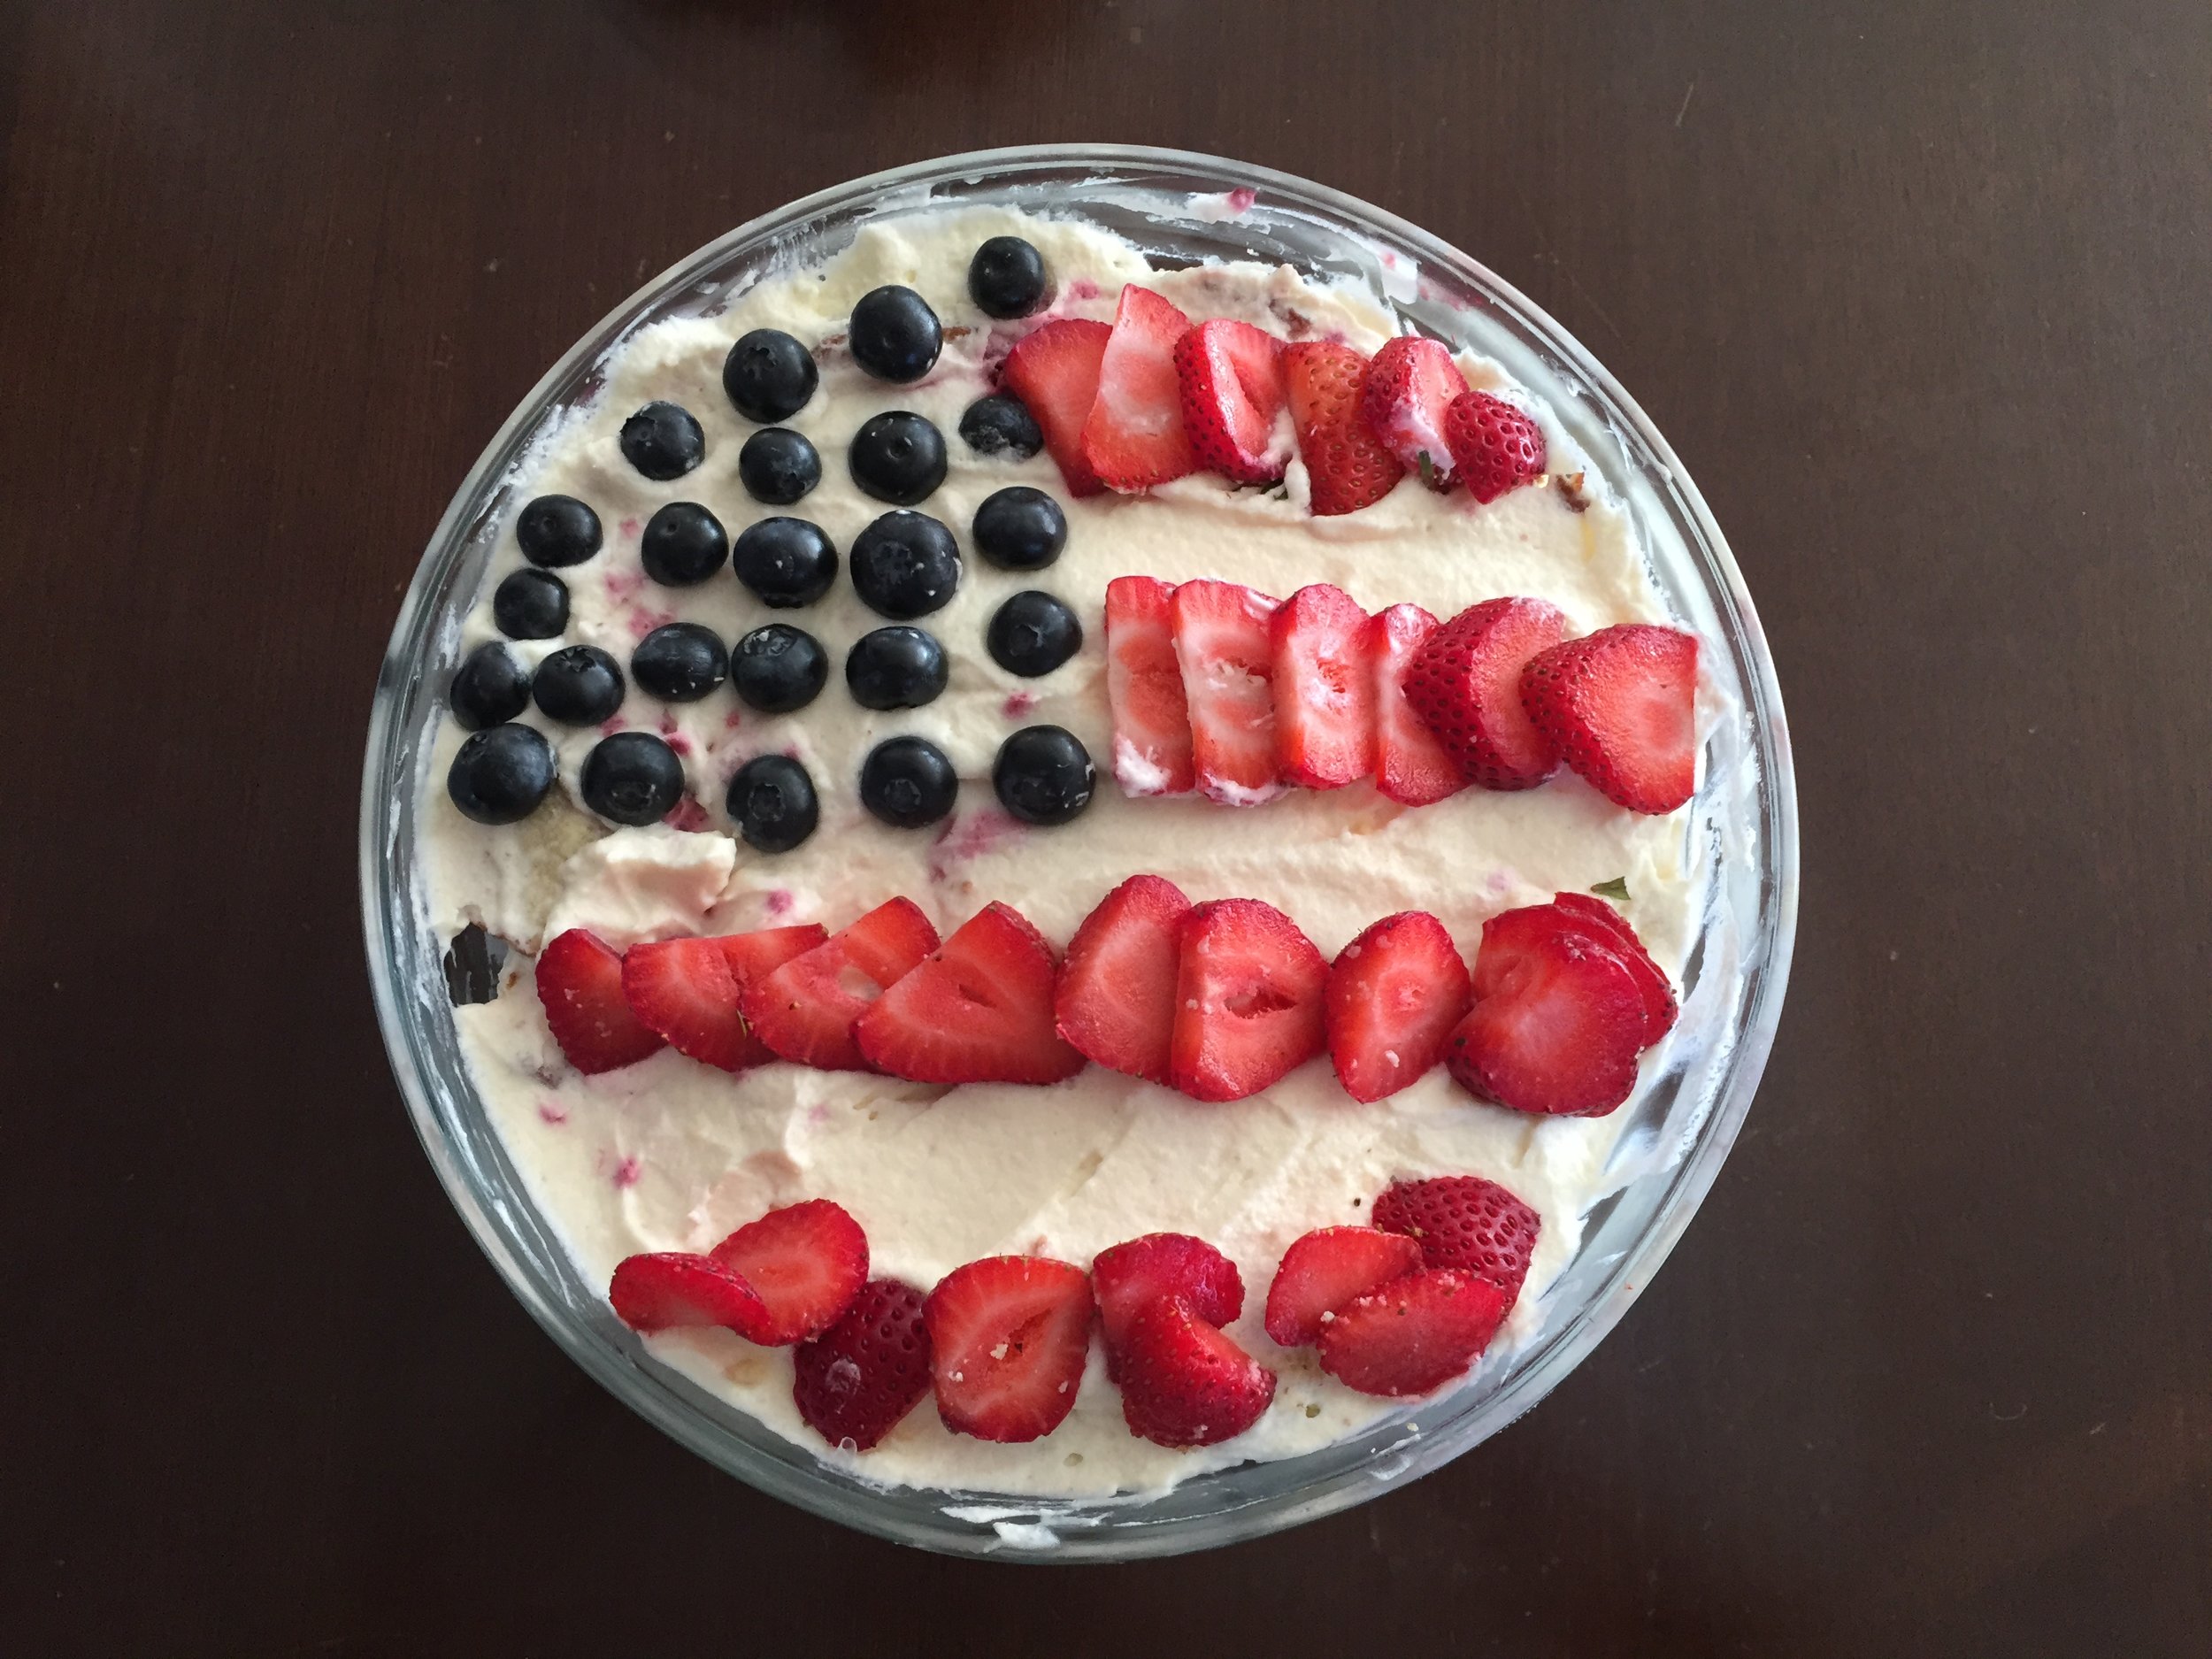
- Layer 4: Design the top! In honor of the 4h of July I made an American Flag using
- Let it chill! Once constructed you'll want to give it time to rest and set in place. At least an hour in the refrigerator is necessary, but 2-3 are optimal.
Building the Beast...