I have always LOVED buffalo wings. We had this late night delivery spot that was pretty close to my college campus, they had about 30 different flavors and to this day it is still my favorite wing place. Every UMass Amherst or Springfield area college alum knows exactly what I’m talking about… Wings Over. [drooling]. That said, they also made me pretty fat in college, and that is no bueno. Oh, and then they opened one in my hometown. If one pops up in LA, I’m doomed.
Not these babies though!! They are breaded with almond flour and pork rind which keep the carbs low and the fats up so my body just keeps on burning fat like a well oiled machine. It’s a beautiful thing.
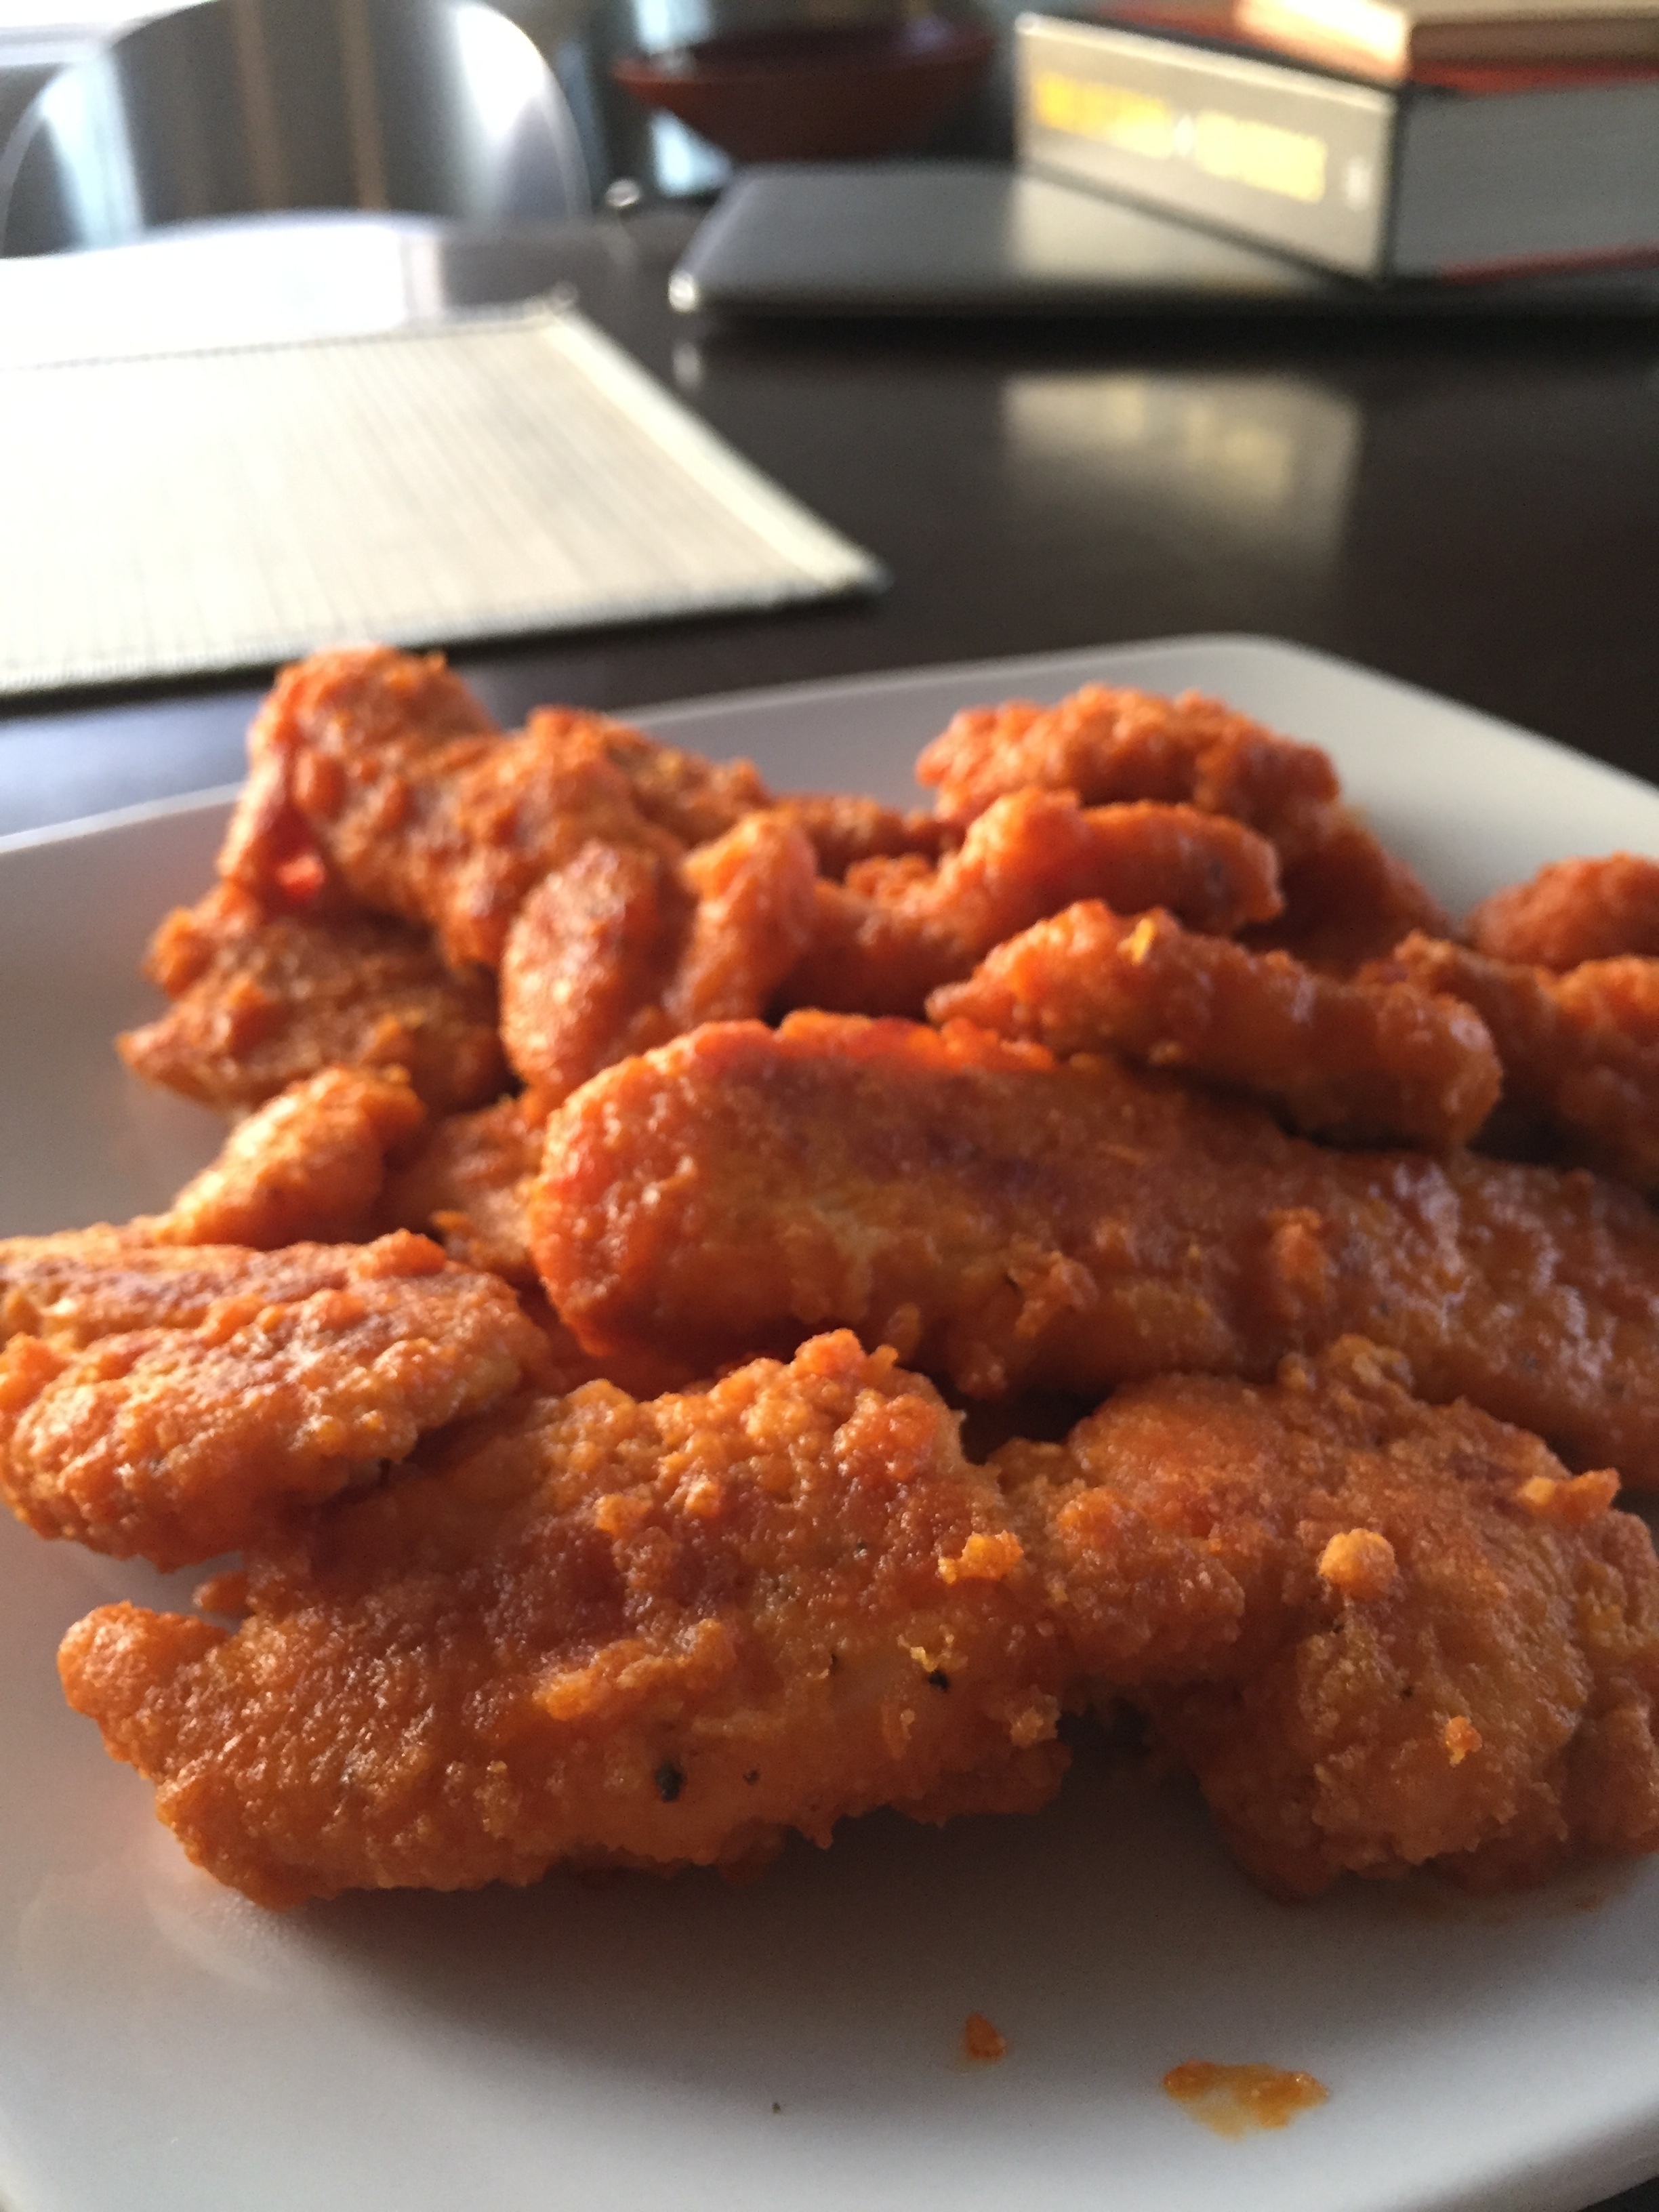
The buffalo sauce is as simple as they come and it’s all you need for a really good buffalo sauce. Not too hot and the right amount of saucy. It’s just equal parts butter and Red Hot. Now, I love all my hot sauces, but Red Hot is an old stand by. It’s the only one they had in my high school cafeteria and I put it on everything.
These Keto Buffalo Tenders are really easy to make and don’t take much preparation. The chicken is very lean and protein dense so be sure to not over do it, too much protein can knock your fat burning ass right out of ketosis!

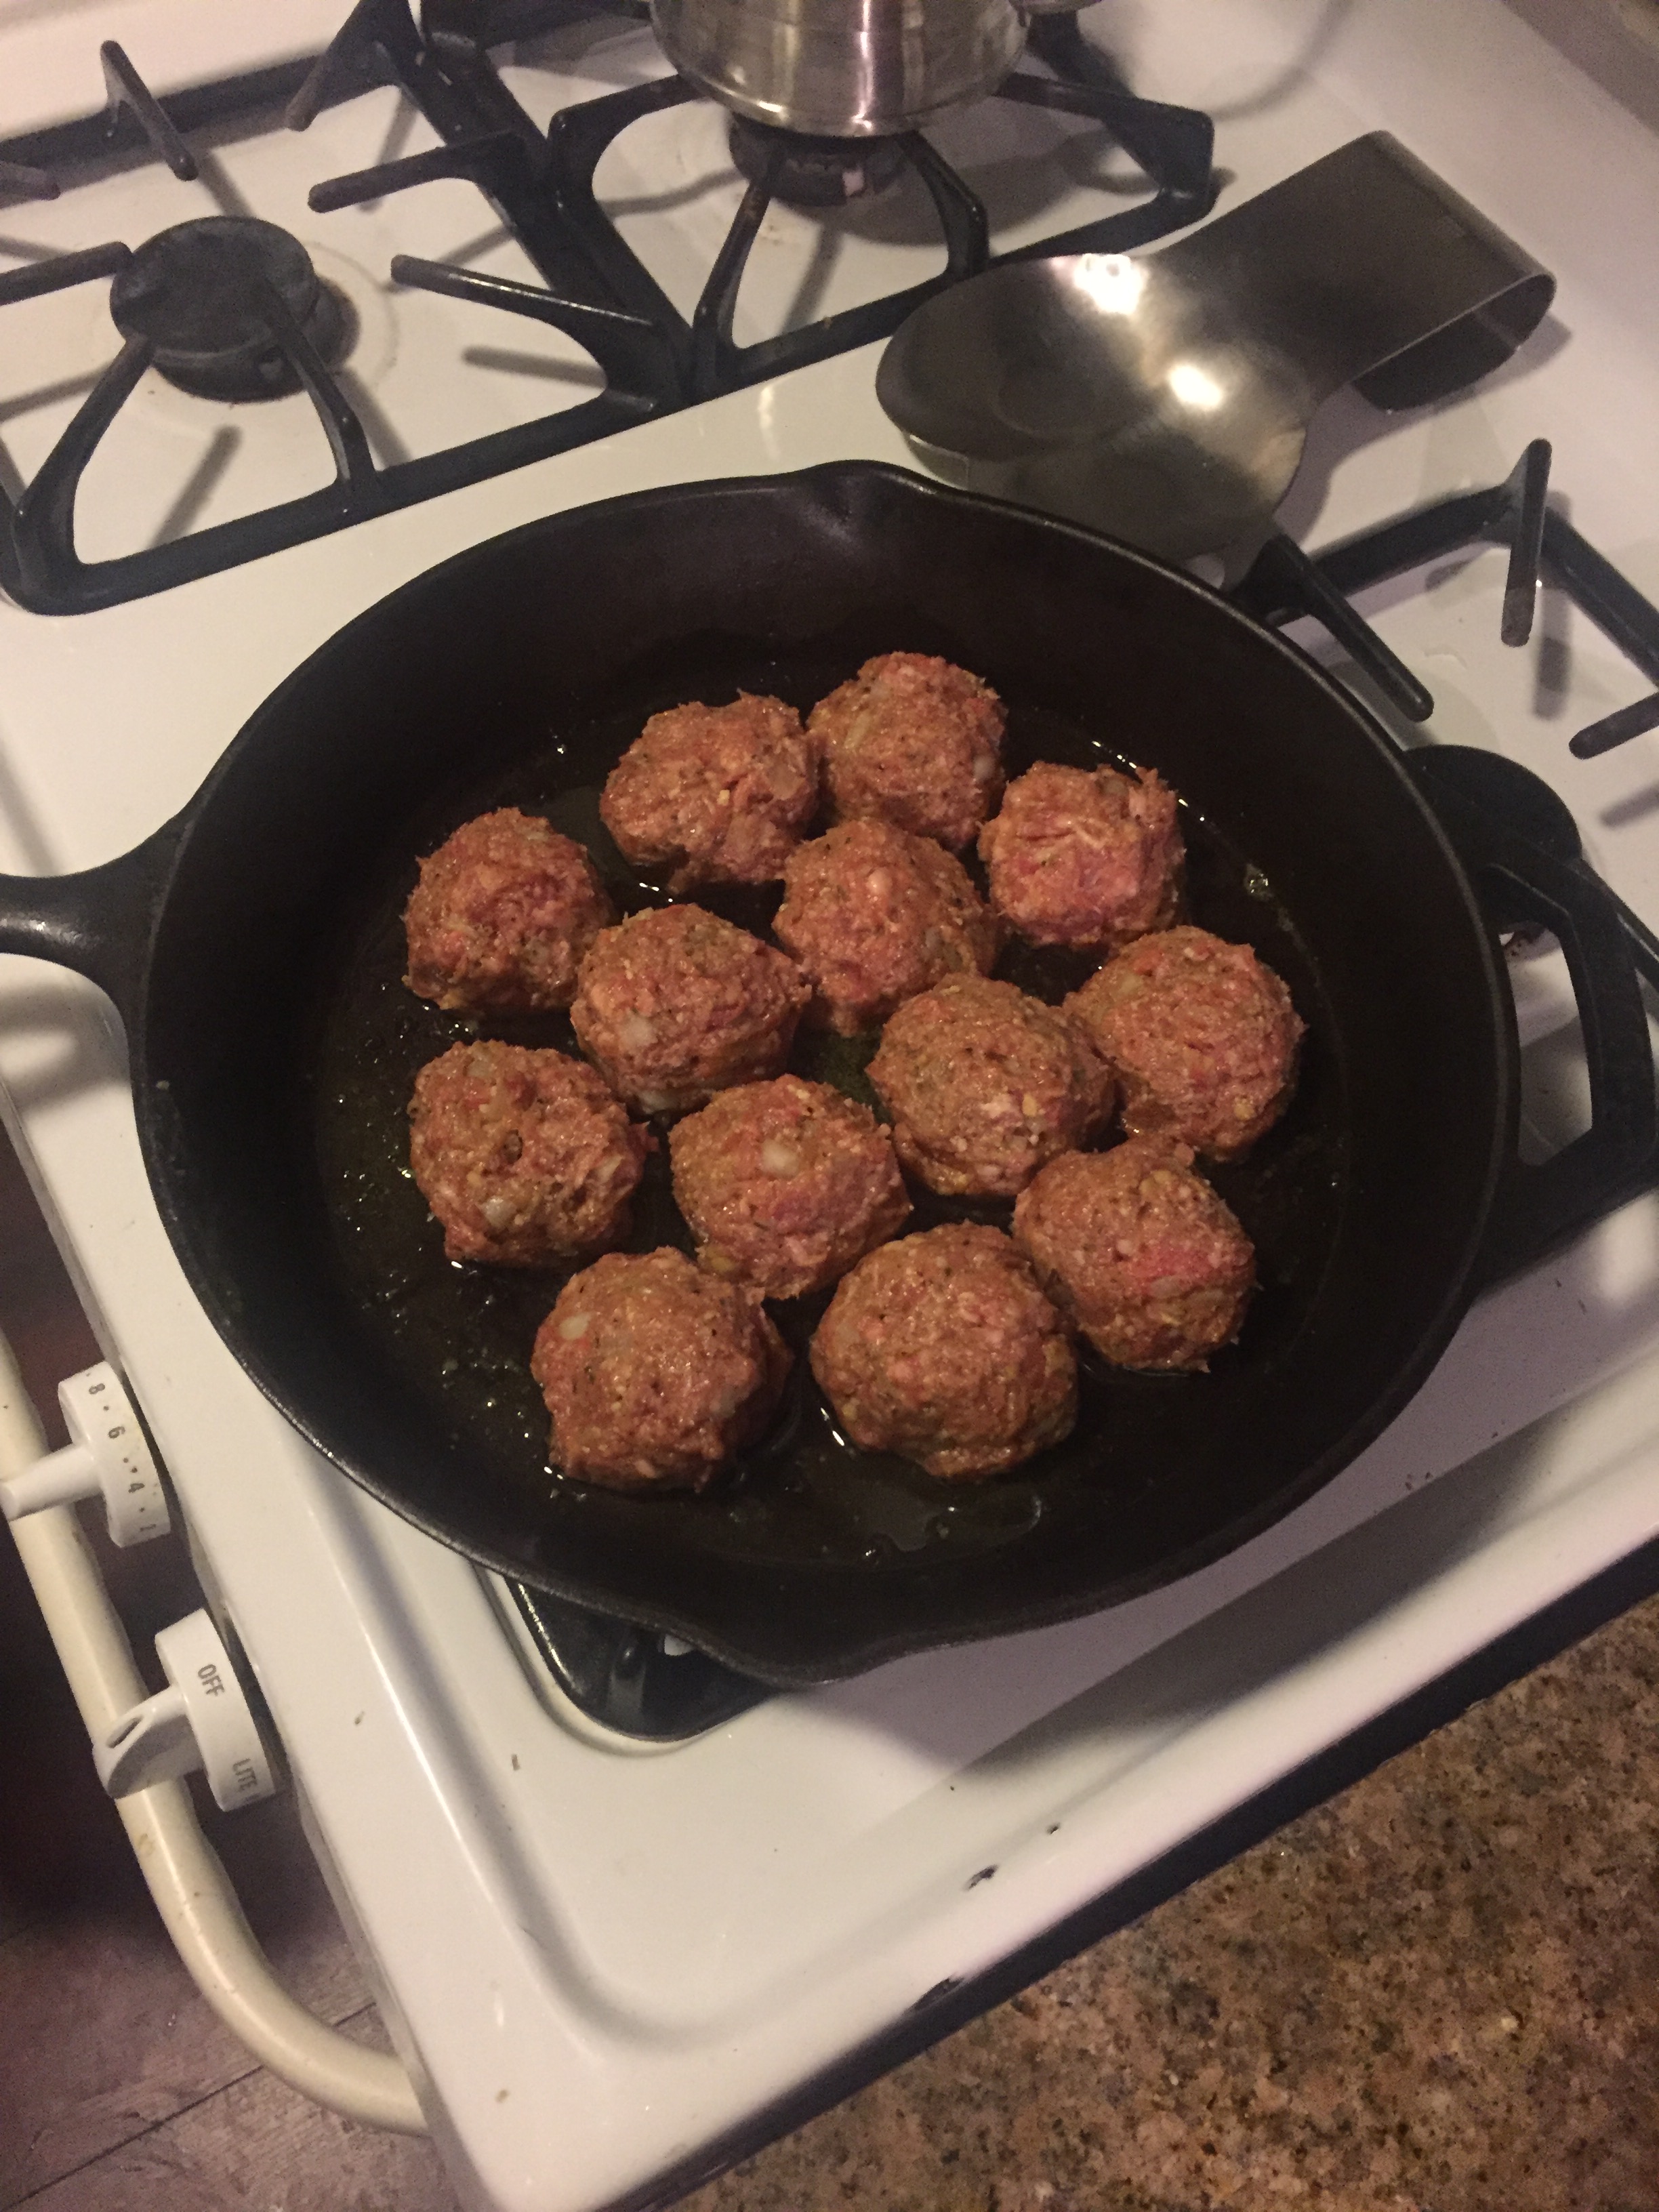
The egg batter and the breading...
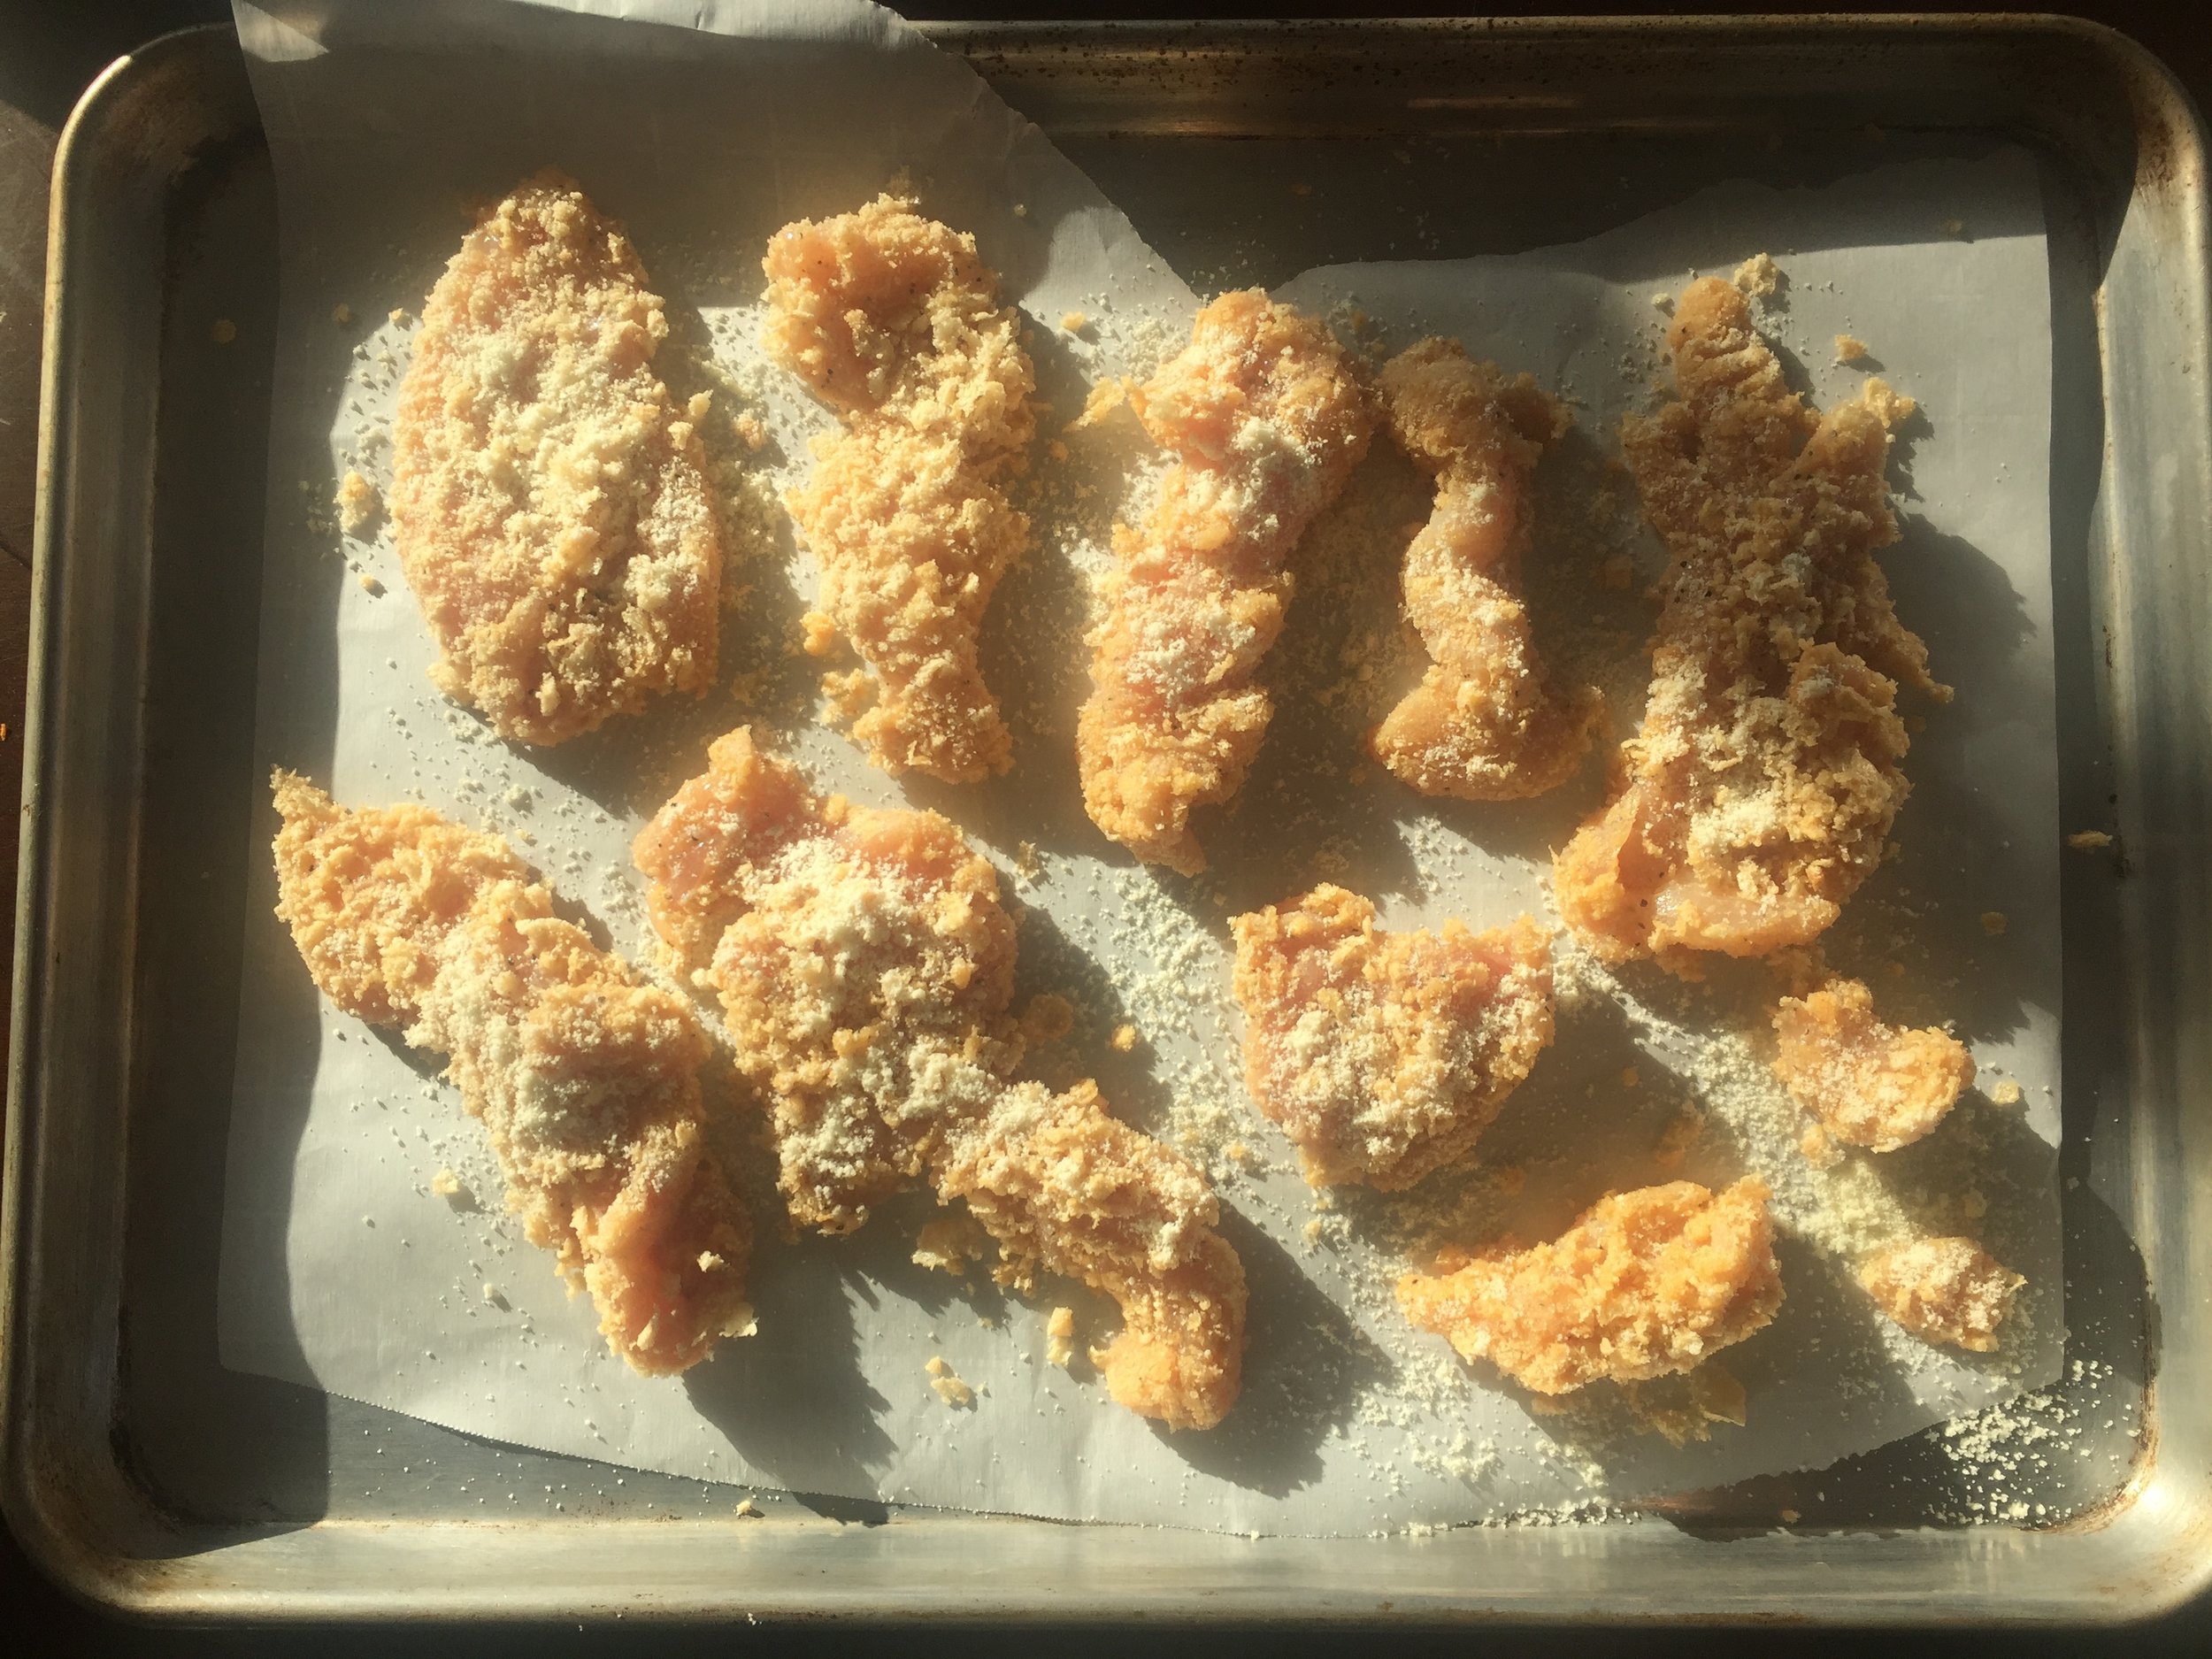
Ready for the oven...

The Sauce...
Back to the buffalo tenders, hit em with the ingredients…
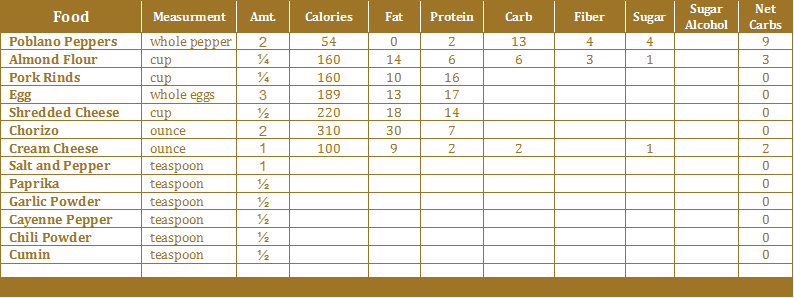
- 1 pound Chicken breast or tenders.
- ½ cup Almond Flour
- 1 cup Pork Rinds
- 3 Egg
- 2 tablespoon Heavy Cream
- 1 teaspoon Paprika
- ½ teaspoon Garlic Powder
- ½ Cayenne Pepper
- 1 teaspoon Salt
- 1 teaspoon Pepper
- ½ cup Red Hot
- ½ cup Butter
The Steps...
Preheat oven at 400F
Cut the chicken breasts into desired size and length. I usually just get the pack of chicken breast “tenders” which are the perfect size. Plus they stay really moist with a bit of thickness.
Pound and flatten the chicken a bit. I actually just use my handheld citrus juicer to do this, because its pretty heavy.
Mix your batters. In one bowl mix your egg, heavy cream, salt, pepper and a little bit of Red Hot if you like it spicy.
In another bowl, mix crumbled pork rinds, almond flour, garlic powder, salt, pepper, paprika, cayenne pepper
Dip the chicken in the egg batter and then into the breading. Make sure to get an even coat. If nothing is sticking add another egg, this will make it stickier.
Lay all the tenders on a baking sheet. If you have parchment paper this works really well to avoid the breading sticking to the pan.
Cook chicken for about 20 minutes or so. Until the tops look crispy. Flip halfway through for crispier tender.
In a small pan mix Red Hot and Butter and cook on a low heat until fully melted and mixed.
In a large bowl add the chicken fresh out of the oven. Add in the hot sauce and toss.
Slice up some celery, blue cheese whatever you preference and enjoy!